DTMF Remote control and sequencer

Many years ago I built a remote control for our transmitter. It was pretty simple, just a dtmf decoder rescued from an old answering machine.

It served us well for a long time, however it was lost when we moved to a new location.

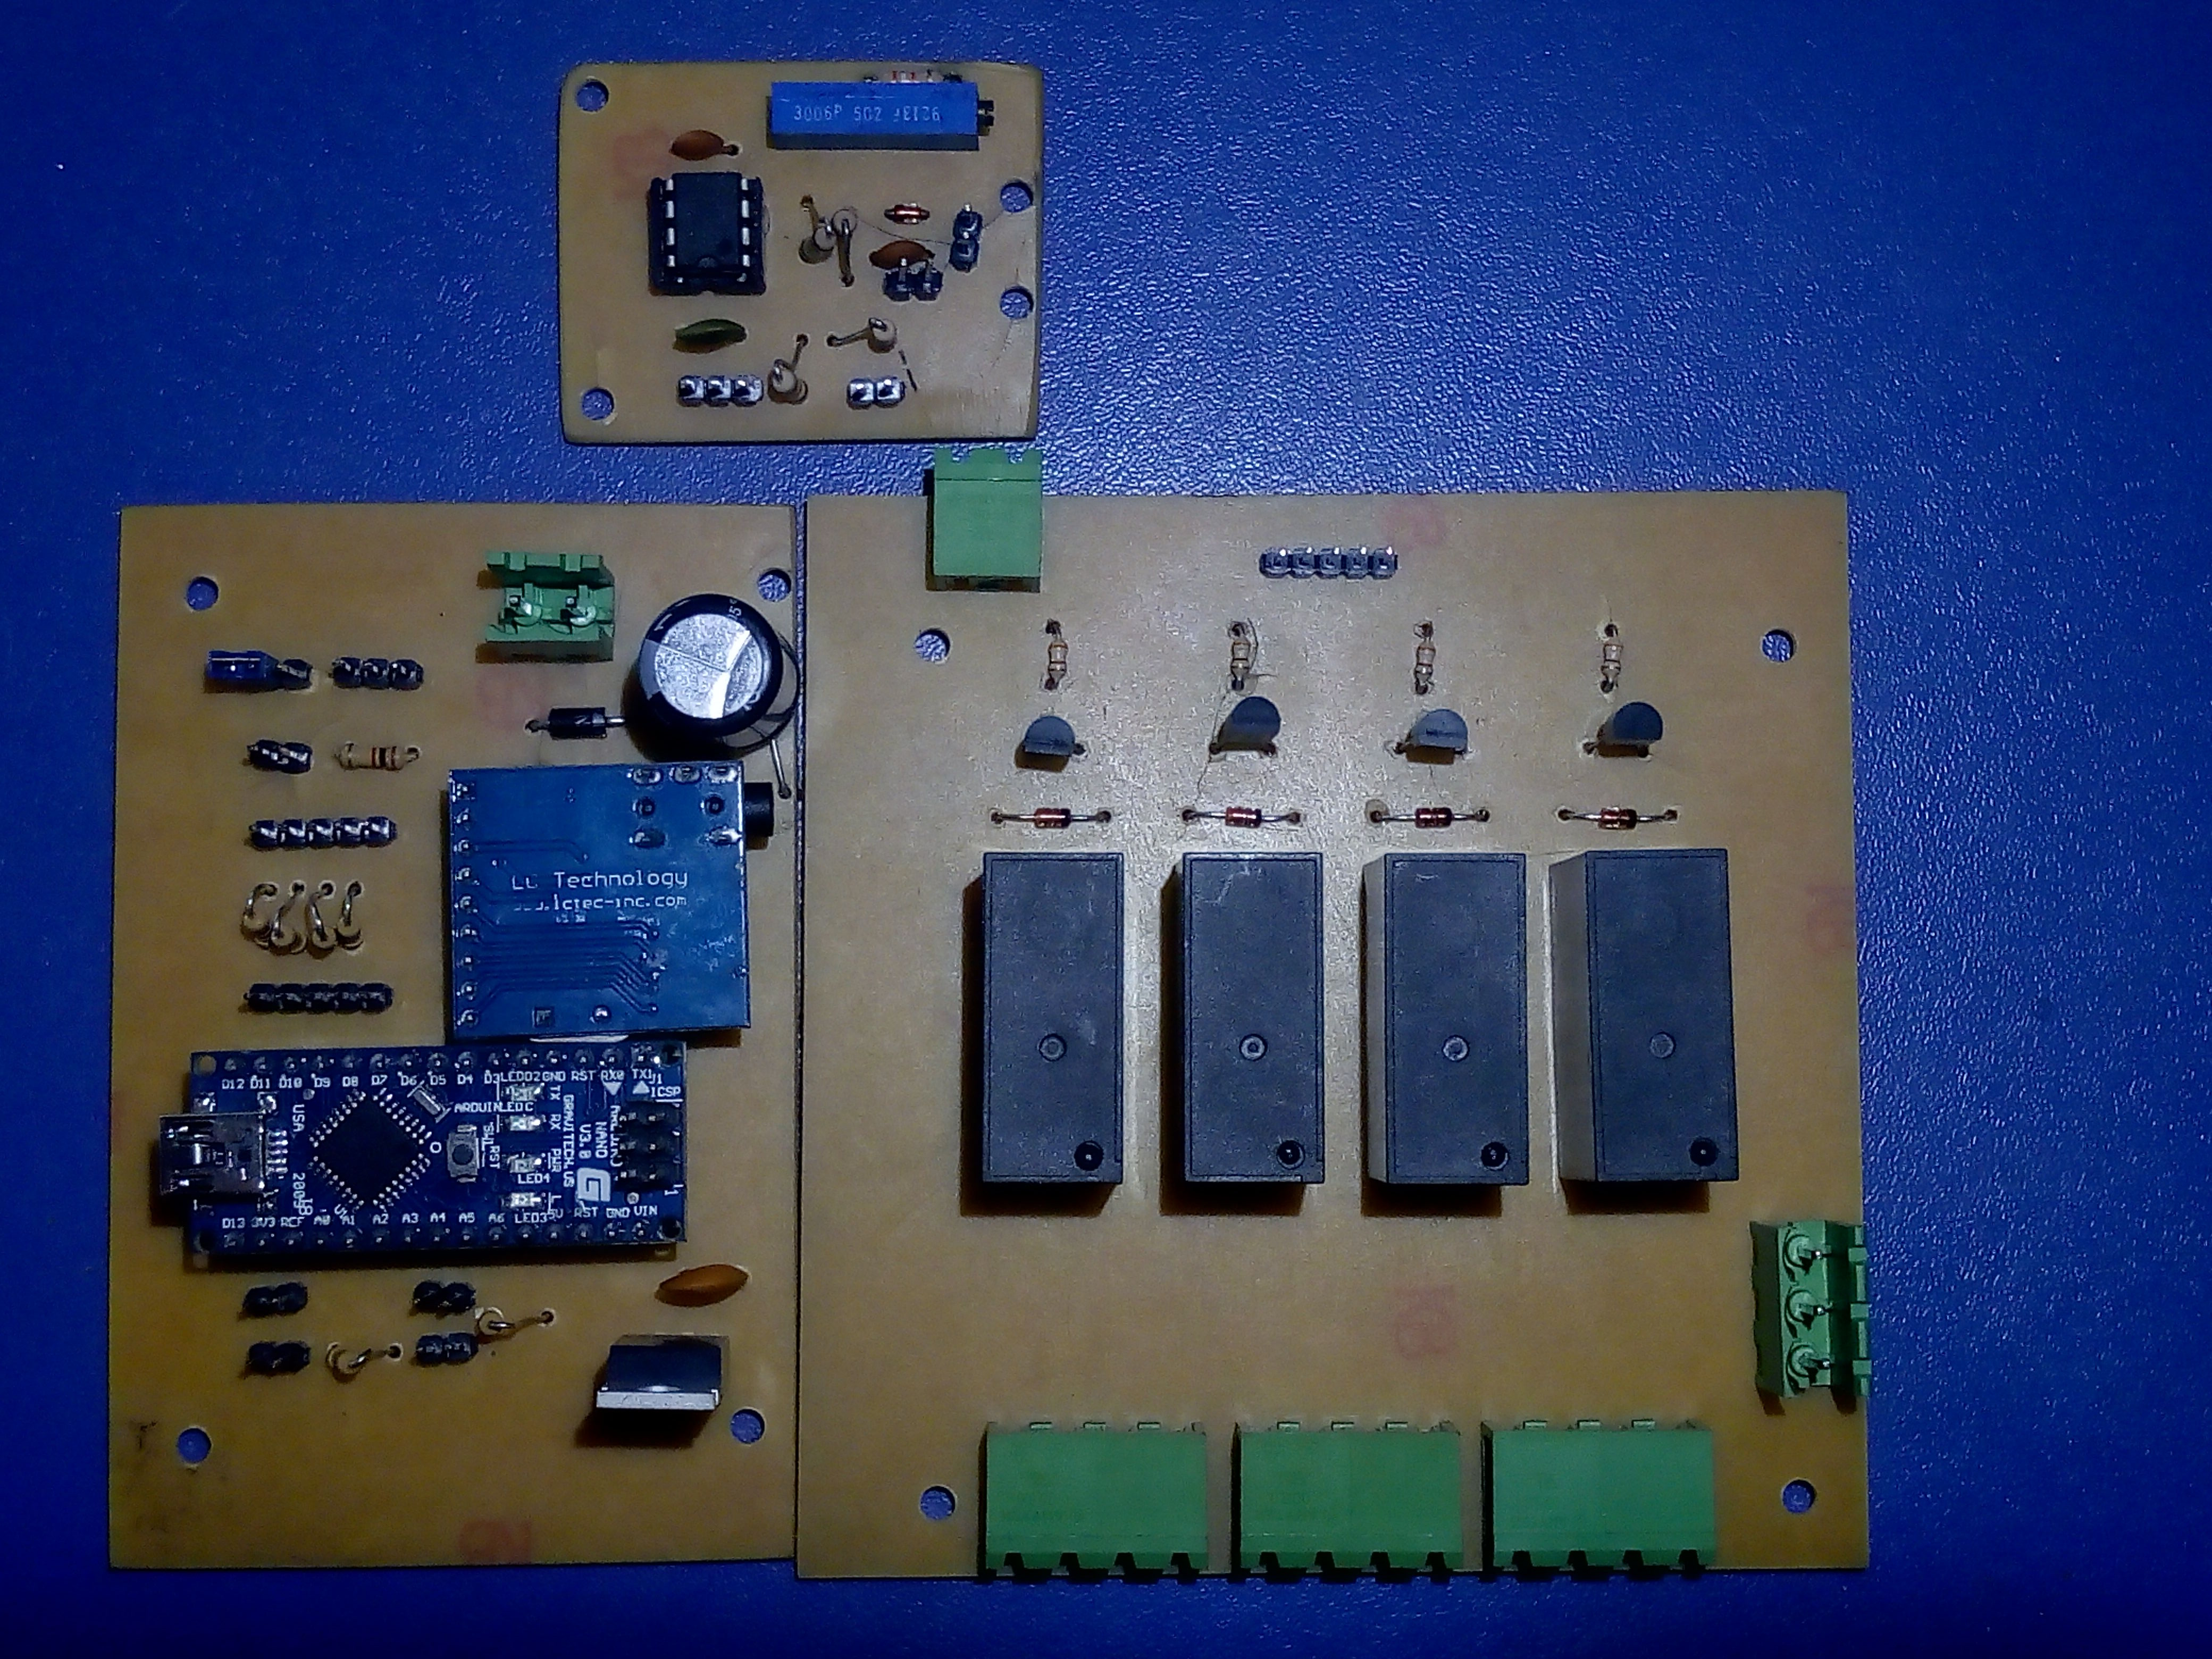
For the last couple of weeks I spent a while polishing the firmware and making new boards in KiCad. The original was very crude, just a simple on/off panel and delayed power sequence.

This one adds an RF sense and automatic restart, so if one of our amplifiers bails out on a power dropout we don’t have to do anything about it.

Yesterday I etched the boards. I ran out of toner and had to ask a friend to print the transfers. They came horrible but work fine nevertheless.

It’s amazing that nowadays buying an arduino and a preassembled dtmf decoder is cheaper than the single chips (and not counting the time to layout a more complex board).

All the design files are here: https://github.com/fm-futura/dtmf-remote-sequencer

DTMF remote

Park bench

A while ago we were given a bunch of weathered wood from a deck. Some of us have been thinking of installing seats on the sidewalk and this looked like a good opportunity.

I looked around Core77 and there’s an entry just about seating that produced this helpful guide:

I built a simple frame with square tubing and used one of the wood packs to try it out. I need to select the best planks but it’s comfy and with a bit of paint will look good.

Assorted clamps

The last two days I finished the welds on those clamps,  built some to hold the other end of the ropes and four sturdier to screw to the roof trusses. All the screws are paired with either a nylock or two nuts locked to each other.

I painted the pieces for the bottom frame with black enamel and the ones for the roof with white to match the rest of the room. I know they’ll rust in some weeks but I left the blued surface exposed. I never tire of looking at them.

Side table iron legs

We had a nice wood slab from the kitchen remodelation and wanted to make a small table with it.

I did a quick sketch and started to build the base. I goofed a bit when cutting the intersections but it ended up fine and level on the first time anyways.

Sometimes I flunk on the easiest of the welds and others, I make a perfect one in a very hard spot. I did this one on a single pass with a bent rod and even had slag peel:

Ceiling lamp fixture: now on steel

For the last couple of weeks I worked on building a steel version of that fixture in order to hang some cable trays and a couple of other things.

After a bit of measuring I prepared all the cuts. For the sides that aren’t at a square angle I left a bit of extra material to fold over the corner. The clamps for the trays will be made with cutouts from square tubing to have a consistent size and some flat stock. I spent quite a bit of time on this phase but I’m pleased with the outcome.

For this welds I tried as much as possible to either manipulate the rod with my left hand only and sometimes with the right, but I still need a lot of practice with that. Some were awful, but others like this one are quite passable:

Lamp fixture: corner bracket, weld detail

A quick test fit and everything fell into the right place. I love it when a plan comes together.

Lamp fixture: trial fitting

Fixing a metal chair

A while ago we bought a very nice set of chairs with a chromed base and the bog standard pneumatic height adjustment.

After a lot of use a couple of them had the welds on the base break apart. I took one home and after thinking a bit I chose to make a stiffening plate instead of just redoing the missing parts as that area looked very flimsy.

Fixing a metal chair

I traced the outline on some cardboard and then cut a bit of plate with the plasma torch.

Fixing a metal chair: stiffening plate

Some light prep and careful welding made it usable again. I tried first with a small 6013 rod but the arc wandered and blew a hole through the thin base. I had more success with 7018. The welds look horrible but are strong enough, I jumped a couple of times and it didn’t even notice.

Intercom mount

We are installing an intercom system and the front door unit is meant to be mounted in a recess in the wall. But the problem is that that wall is not really suitable for making such a hole.

I cut some strips of flat stock and fashioned a box. It has a couple of tabs to bolt into the wall and another ones threaded to hold the device. This is going to be painted later but I love that blue shading.

Sliding patchbay mount

I’ve been working on and off on this for the last couple of weeks. The space we’ll have on the comms rack to handle the wiring isn’t that great and I saw on a couple of places patchbays that are articulated.

I thought on adding a twist to that and mounting everything on rails. This way I can slide it from behind the rack and then unfold it, gaining access to both sides.

We bought some pre-drilled (but not taped, ugh.) angle with the holes spaced in standard units, that was welded into a fixed frame with a couple of hinges.

This will hang from a small cart with iron wheels that rides on a couple of rails fixed to the walls.

Steel doors for rack closet

With the outer frame already built I continued with the doors. During the last couple of days I made the frames, aligned the hinges and had them welded. I also started to cut the expanded metal for the body and made a couple of simple handles.

Fixing an inverter welder

Today while working on the rack closet the welder died on me for no apparent reason. But, after power off it made a couple of noises and the fan ran for a moment.

For being a Chinese machine it actually looks quite good and neat on the inside. The boards have conformal coating and just a tad of flux residue on some pads. The only thing out of place was a blob of solder on a header instead of a jumper.

I made a couple of measurements, the high voltage section was fine but the control supply was totally dead, except for a brief moment when turning off the main switch. Traced back from that board until finding a small block with a forward converter (kinda odd, I expected a flyback). The only component with bad readings was the recovery diode. I swapped in an UF4007 and at the next flick it was alive again.

Of all the things that could go wrong with a welder on novice hands this was not expected.

Door frame

The next step in the making of the rack closet is the front door frame. It’ll be screwed to the base and the top support. For that I’ll use some square tubing with a cap and nut welded to each end.

The lines scribed on those pieces look a lot like the iconic map of La Plata.

Each one was beveled and welded in the tubes. I ground the sides flat mostly for looks.

As I still had a while more with sunlight I used the support built earlier to keep them in place and tack everything together. Enough work for a Summer Friday.

Tacking door frame in place