Some days all I want to do is smash a hard drive to pieces and pour them into a roaring fire.
Some days all I want to do is smash a hard drive to pieces and pour them into a roaring fire.
Today after waiting more than a year since I built them, I finally installed the rollers on our lamp fixture. I also exchanged the roof mounts with something sturdier. Now I only have to retouch the paint on a couple of spots and perhaps build a better winch to pull on all the ropes.


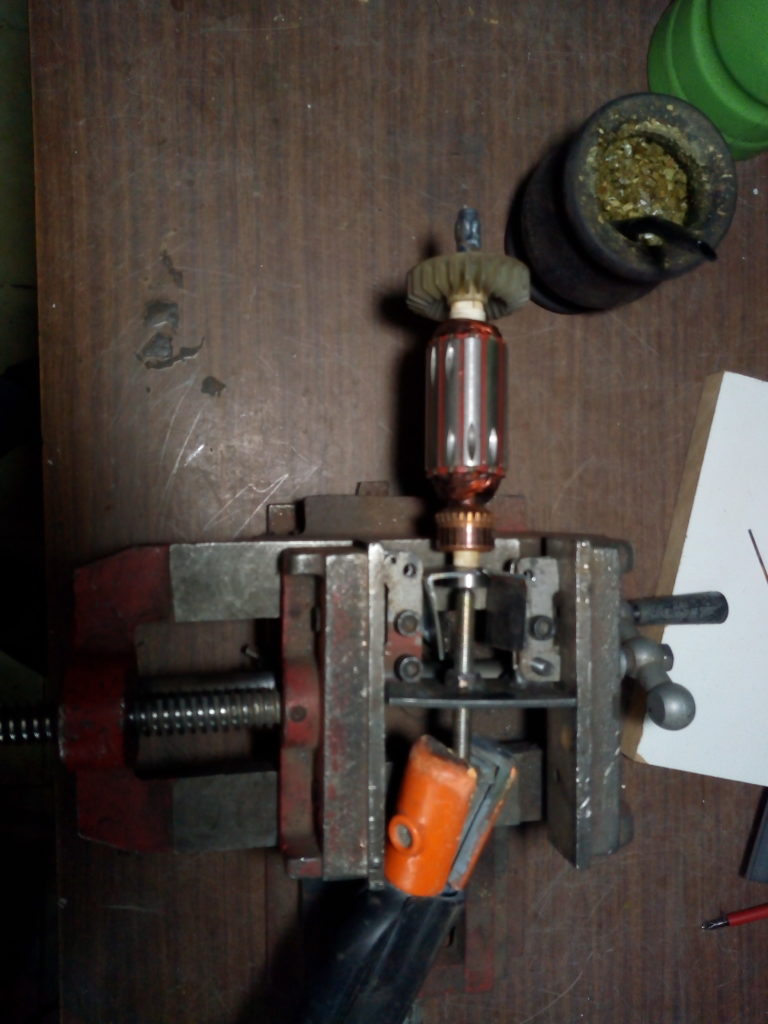
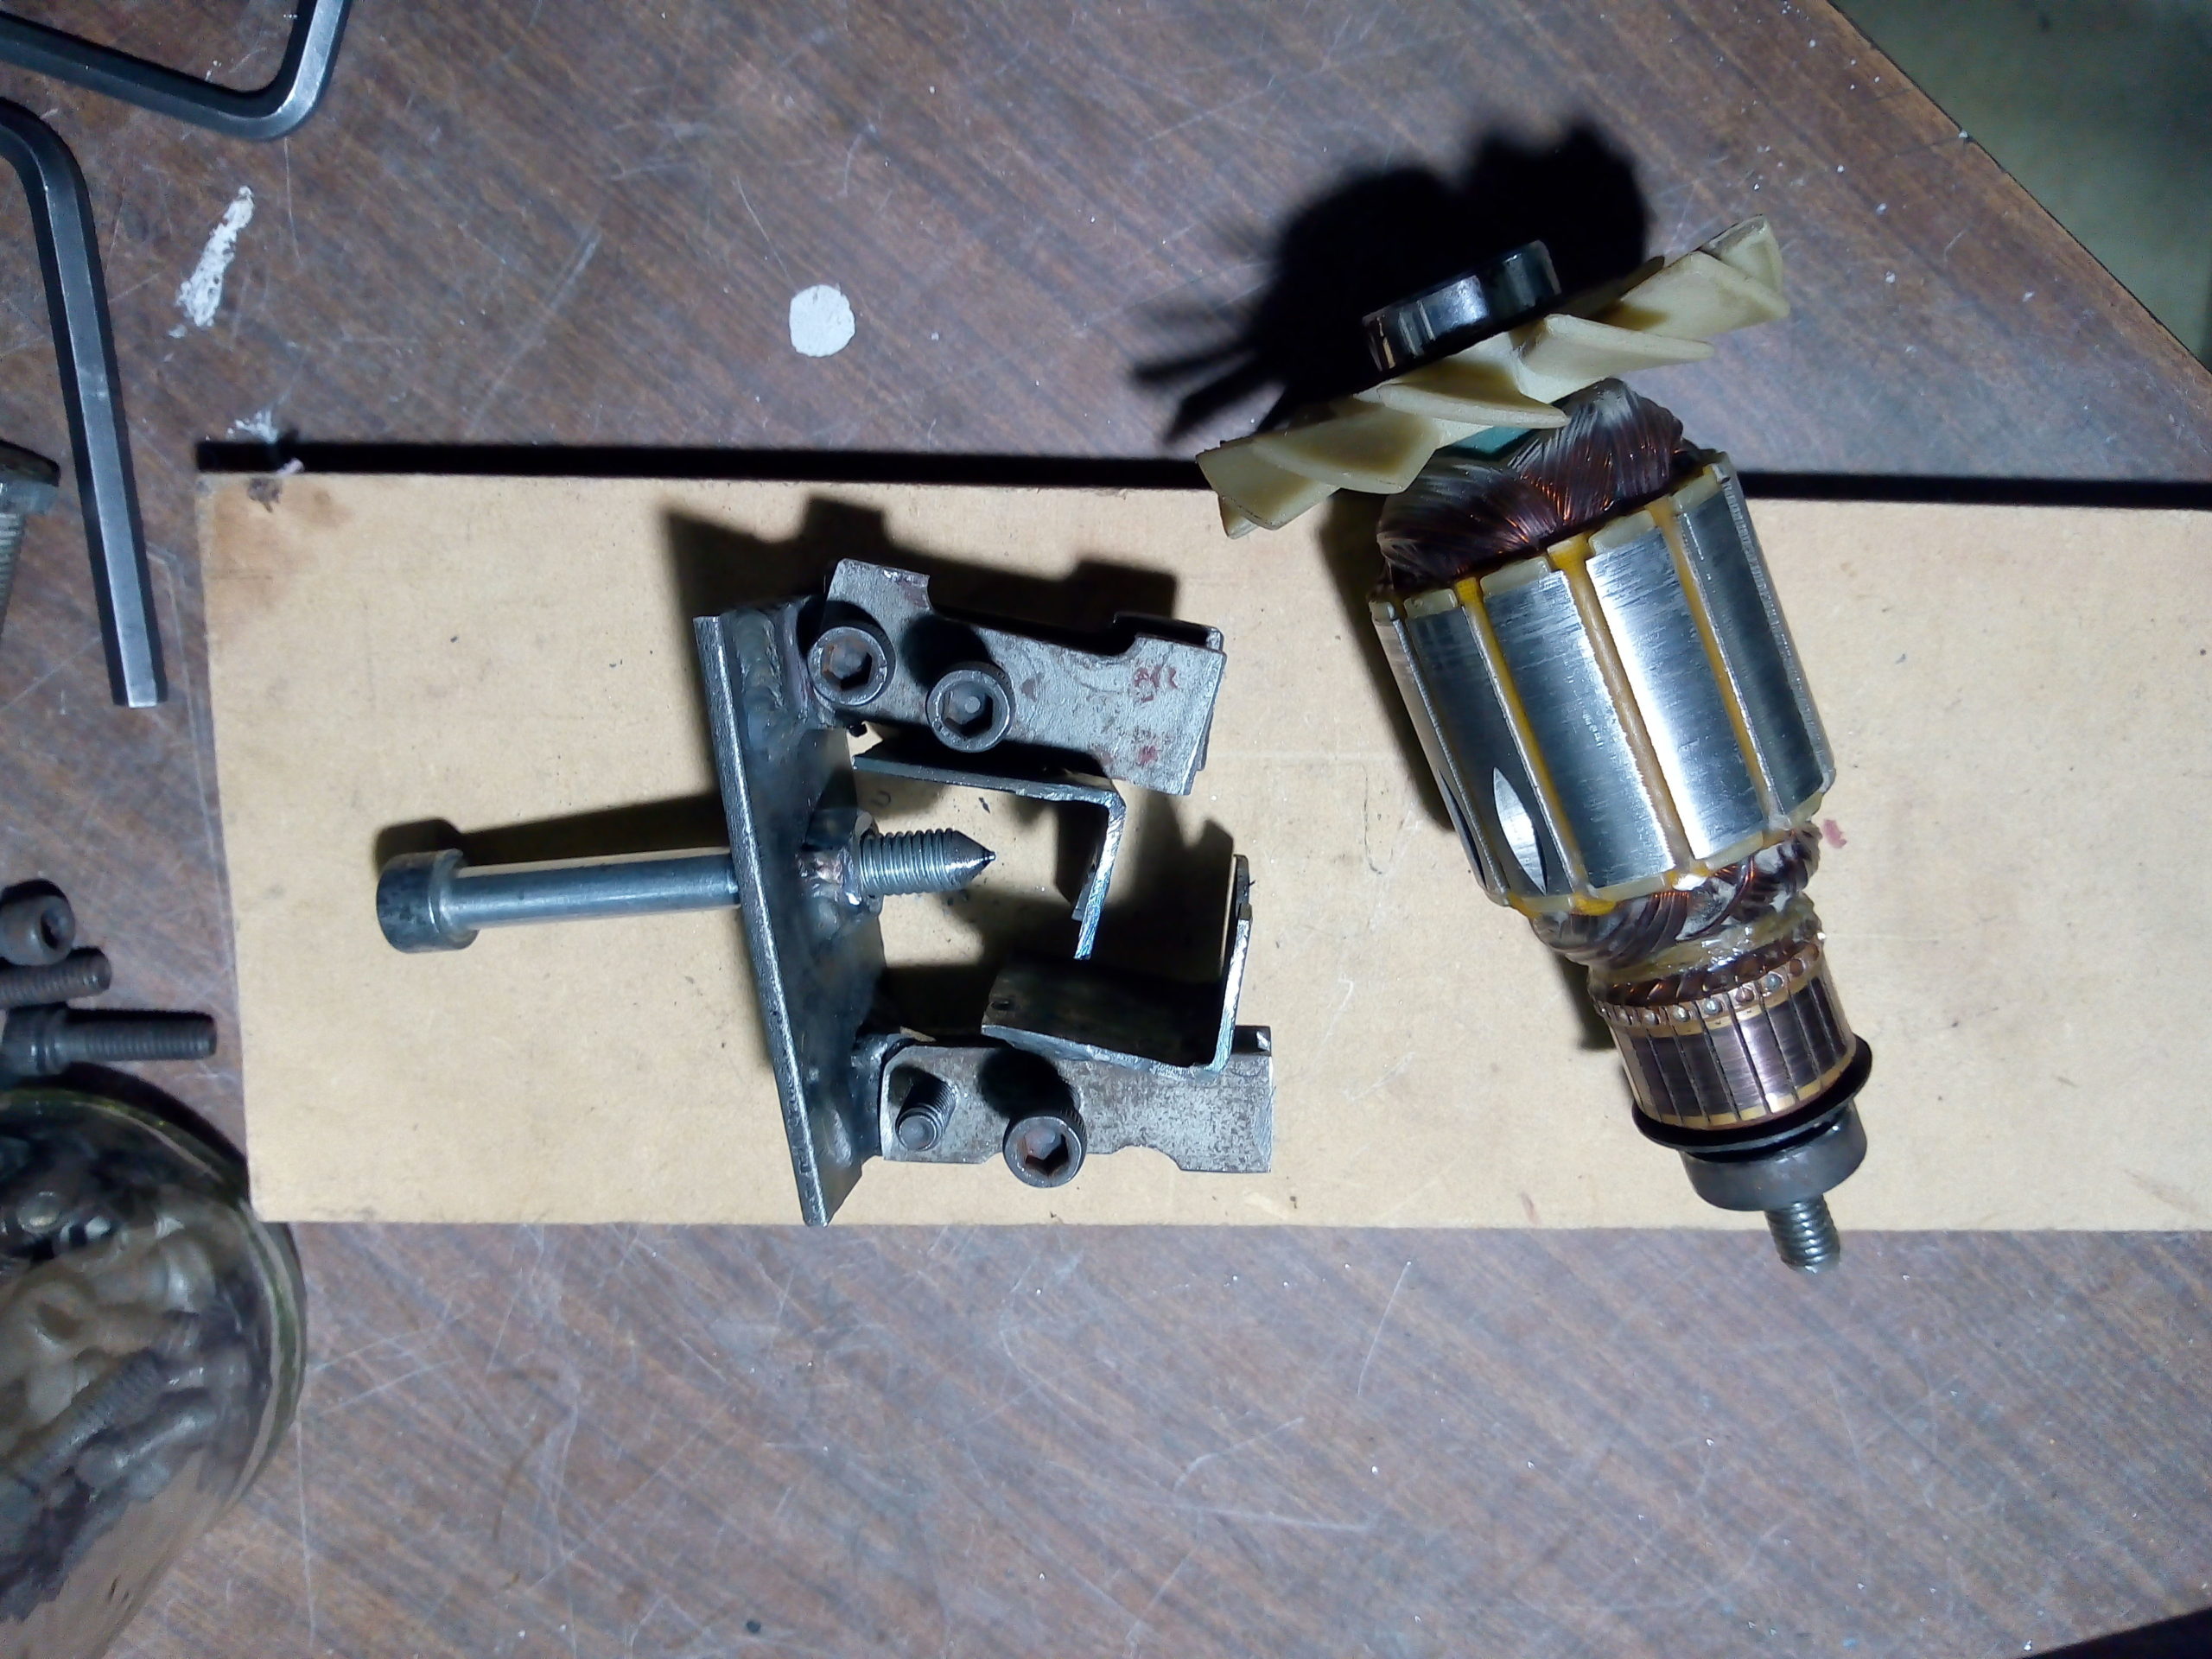
So after building up all the missing metal the next step is turning the shaft back into dimension.
To do this properly a lathe and/or a special grinder is used. I have neither but the points from that compass, a dremel and a bit of ingenuity.
Thus, this is how we create a precision ground shaft in the third world:

I did most of the hard work free hand at the bench grinder and then used this contraption and a small stone on the dremel to get it as close as possible to how it is supposed to be. The keyway only needed a small touch with a round burr after filling the walls.
The gear fits nice with just a bit of runout that I hope the rest of the tolerances will mask out.

And after putting all back together it’s running again. I only needed to add a shim between the gear and the bearing to take out a bit of axial play.
When it broke I was almost about to dump it, I had little experience welding and back then it was really cheap. But in spite of how it looks on the outside it has a very sturdy construction (for its price) and a quality needle bearing instead of a plain bushing like the others.
It was a good call, as now I have another working tool.
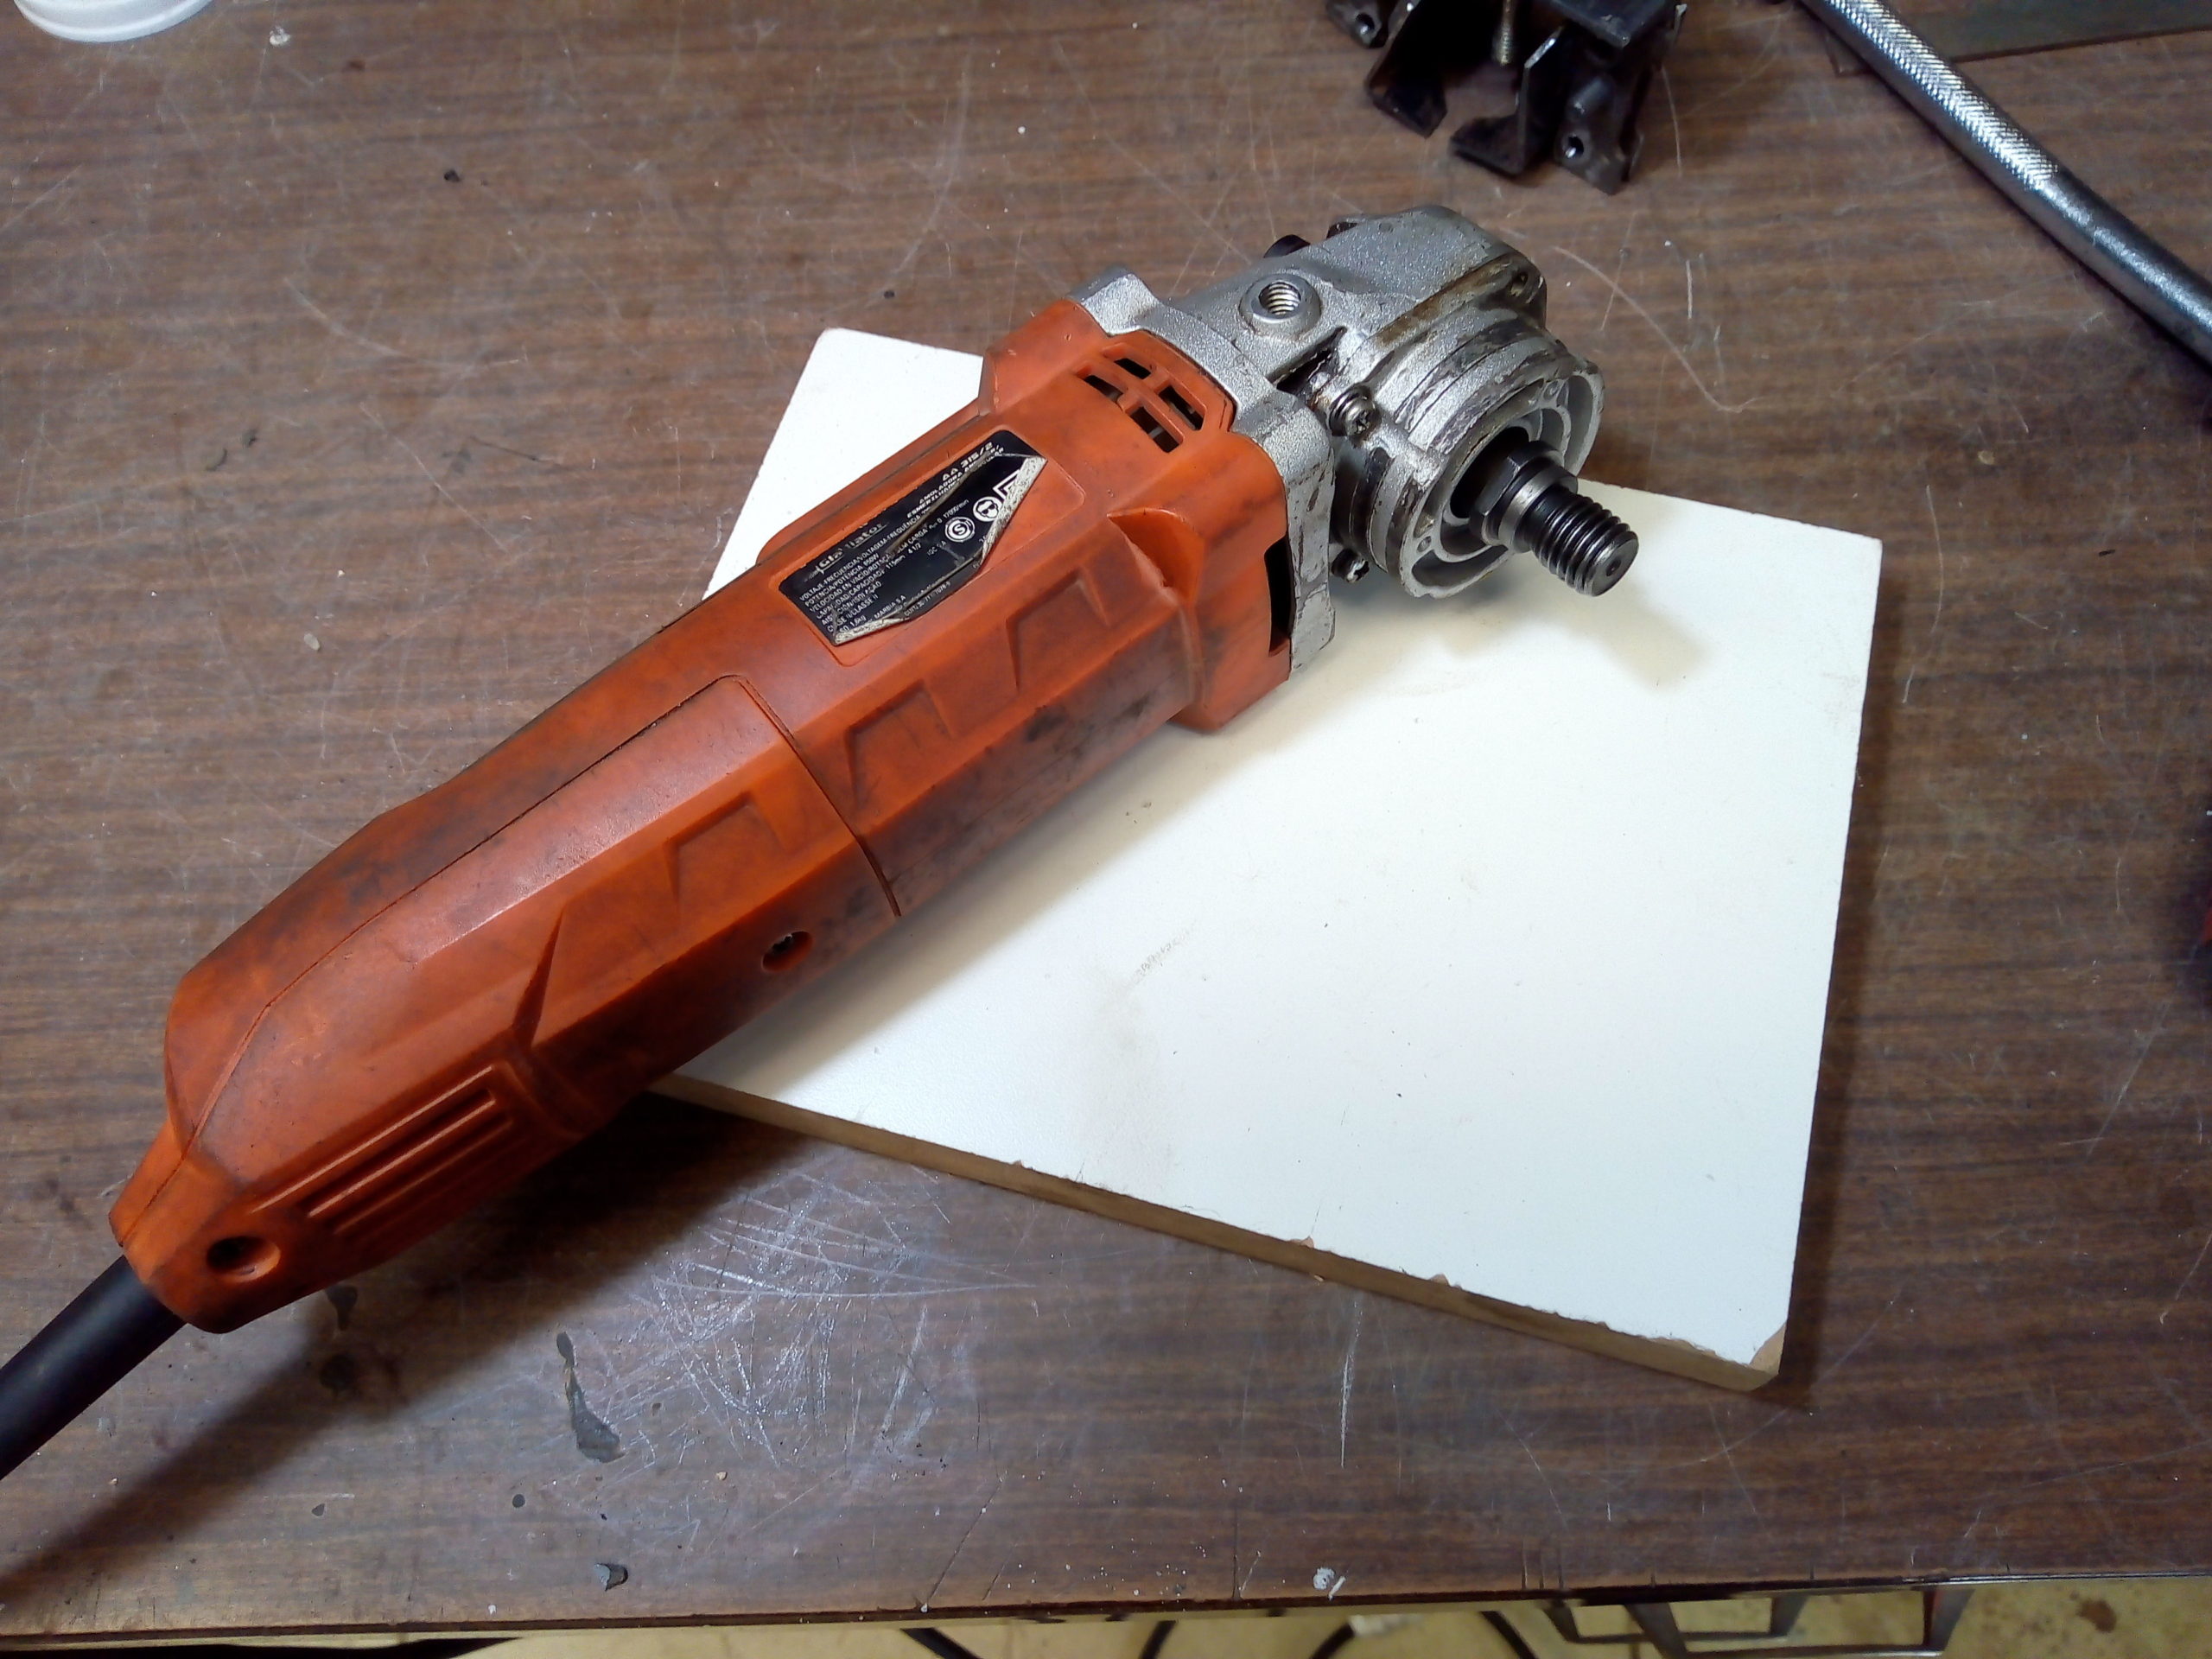
I had this “Gladiator” angle grinder awaiting repairs for quite a lot of time. It was cheap but I liked it a lot because it came with a speed control and took a lot of use without complaining.
But one day it broke. The motor spun, there was a lot of noise but the output wasn’t turning. Inspecting the gearbox revealed that the small bevel gear was free in the motor shaft. The grease had some shiny specks and looking closer the key was still in the gear.
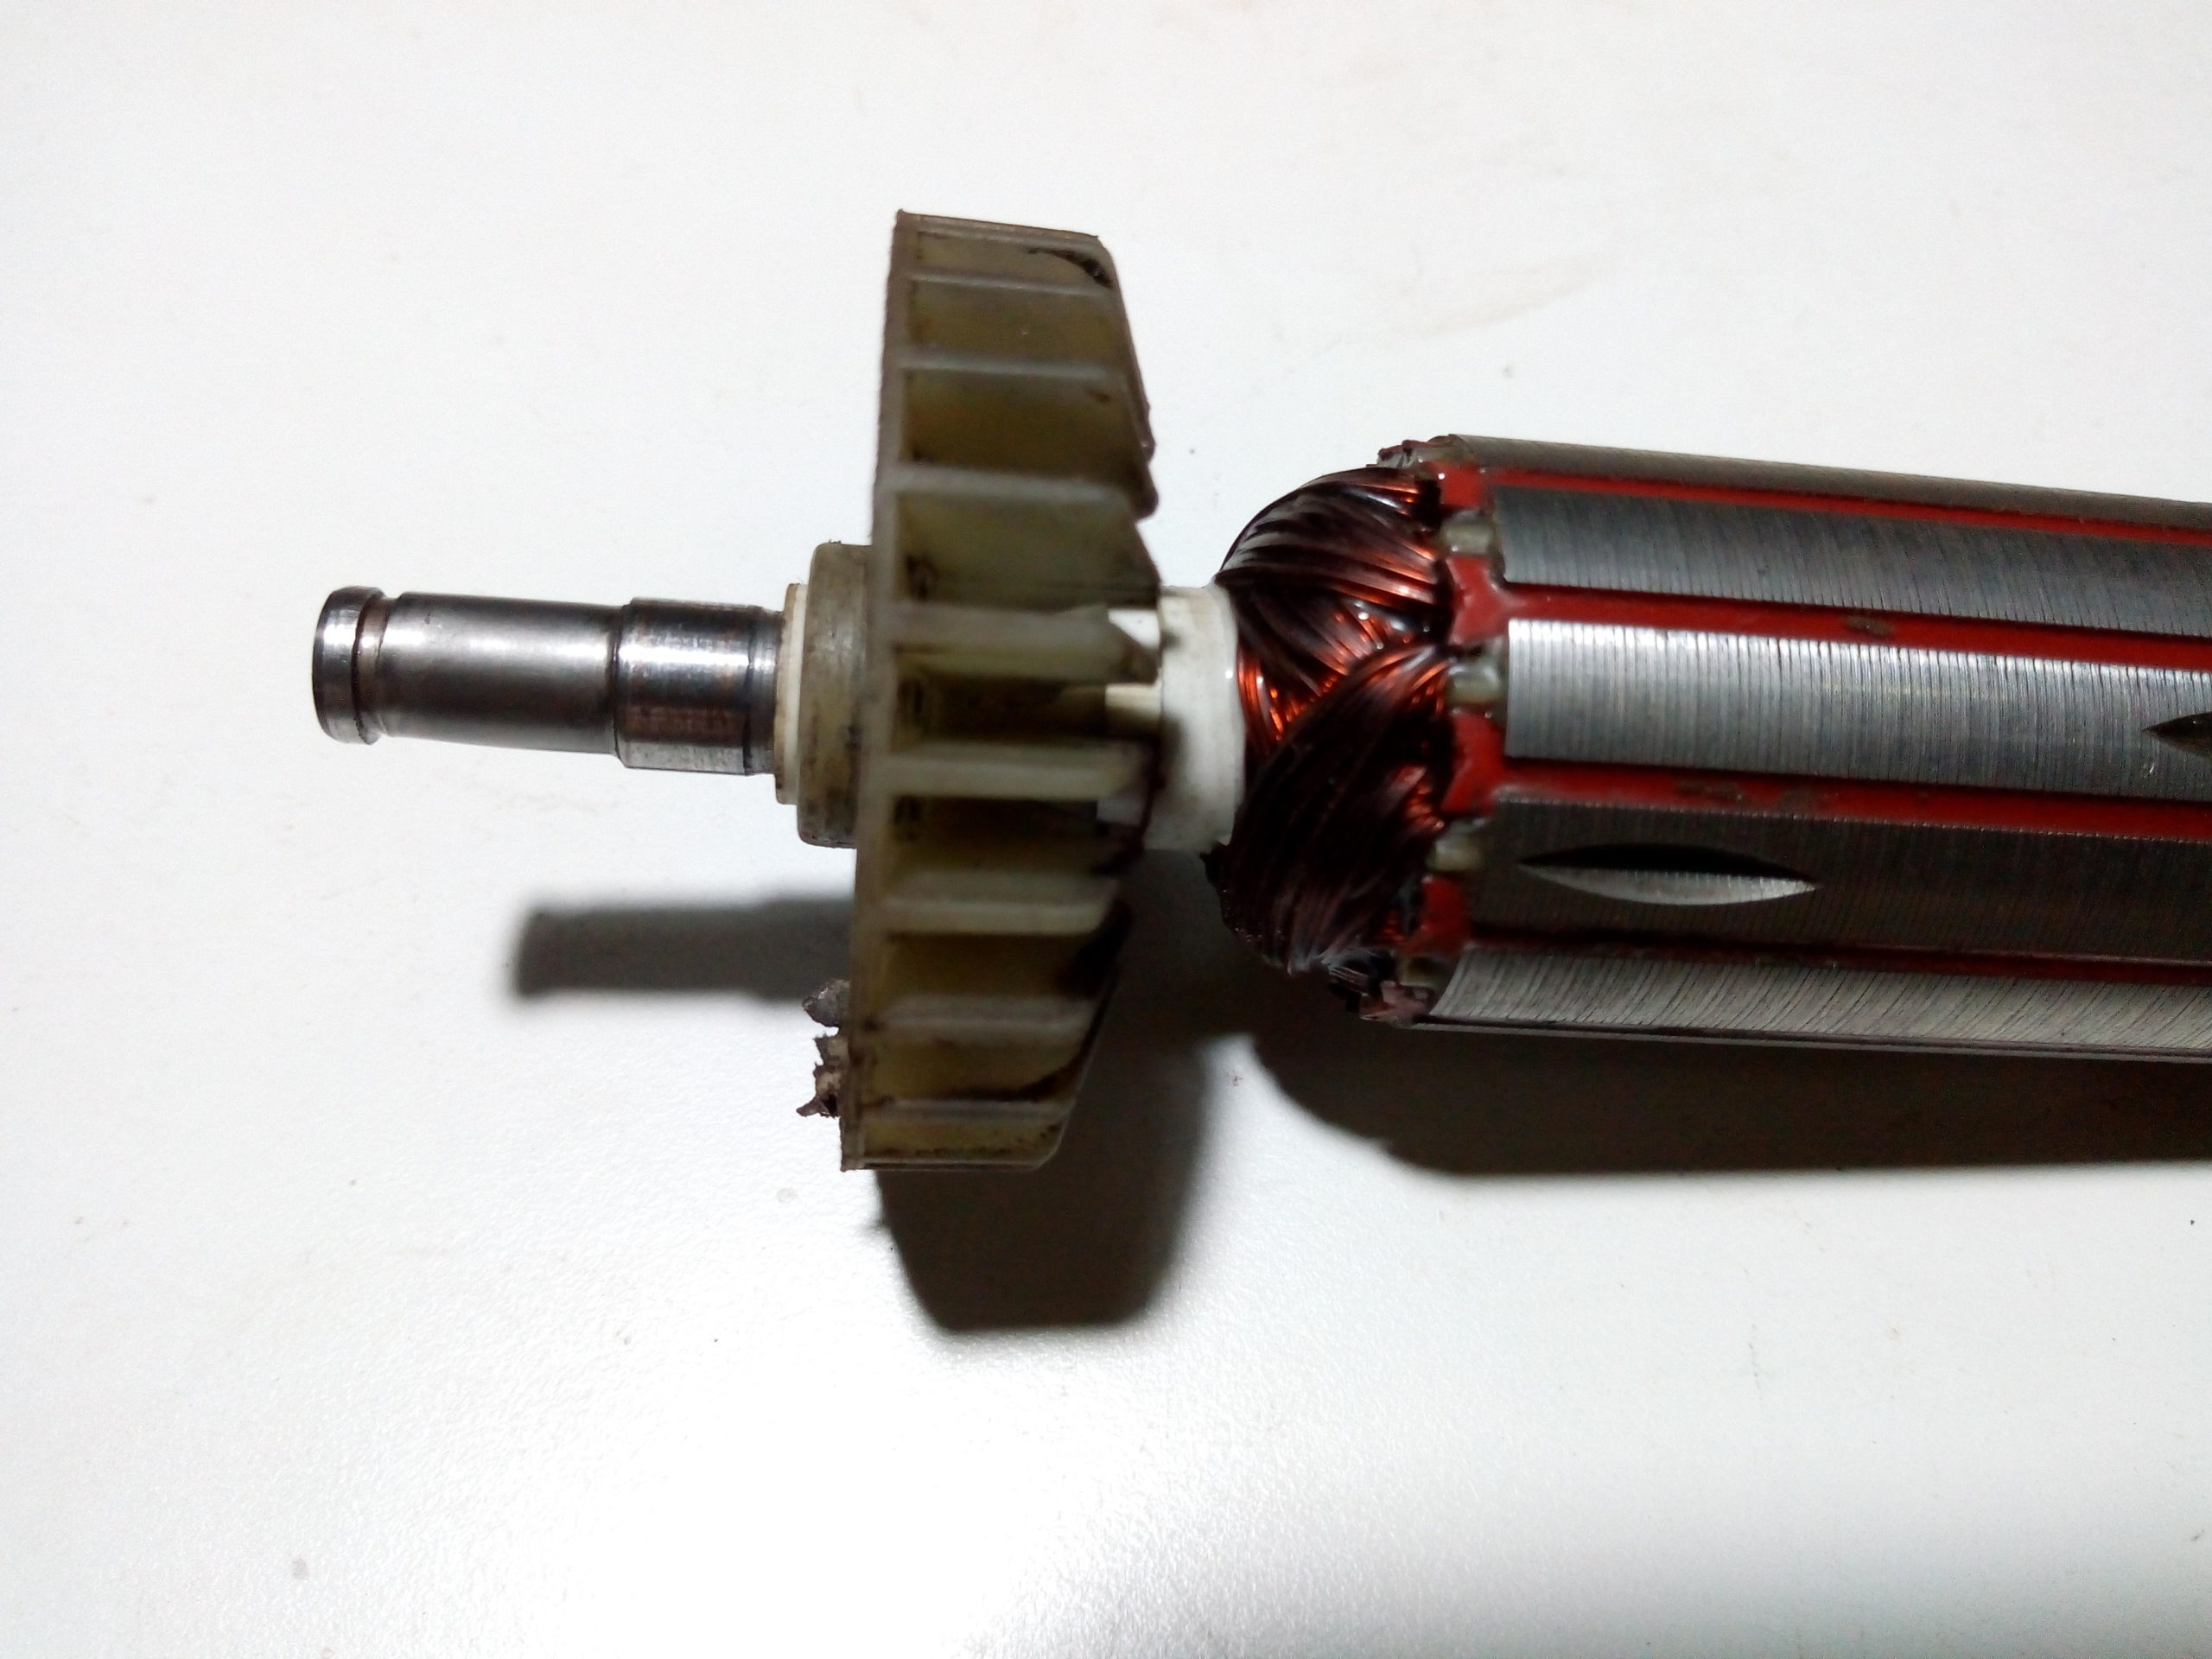
On the previous weeks it started to make louder and louder sounds but I assumed it was kind of normal for the abuse.
And then it seems that the keyway gave up and the shaft, soft as butter, ground itself between the hardened gear and the woodruff key until it became free:
I used the bearing puller to have a solid ground connection and started to pad beads to build up the missing metal. I went a bit overboard with the heat but I somehow managed to not bend nor twist the shaft. Tomorrow I’ll try to grind it back to the original dimensions.

Well turns out that puller works with a bit of effort to keep it from buckling. So I used it to finish a belt sander that has been waiting on the bench.

Because this bearing made an unbearable amount of noise:

It’s amazing how much damage heat and wood dust can do. This was a 608-2RS and the metallic plates behind the seals were worn just paper thin.
Tonight I made something that resembles a bearing puller. I’ve been putting off for quite some time fixing a couple of tools because I needed one and this stormy evening seemed like a good time to end that.
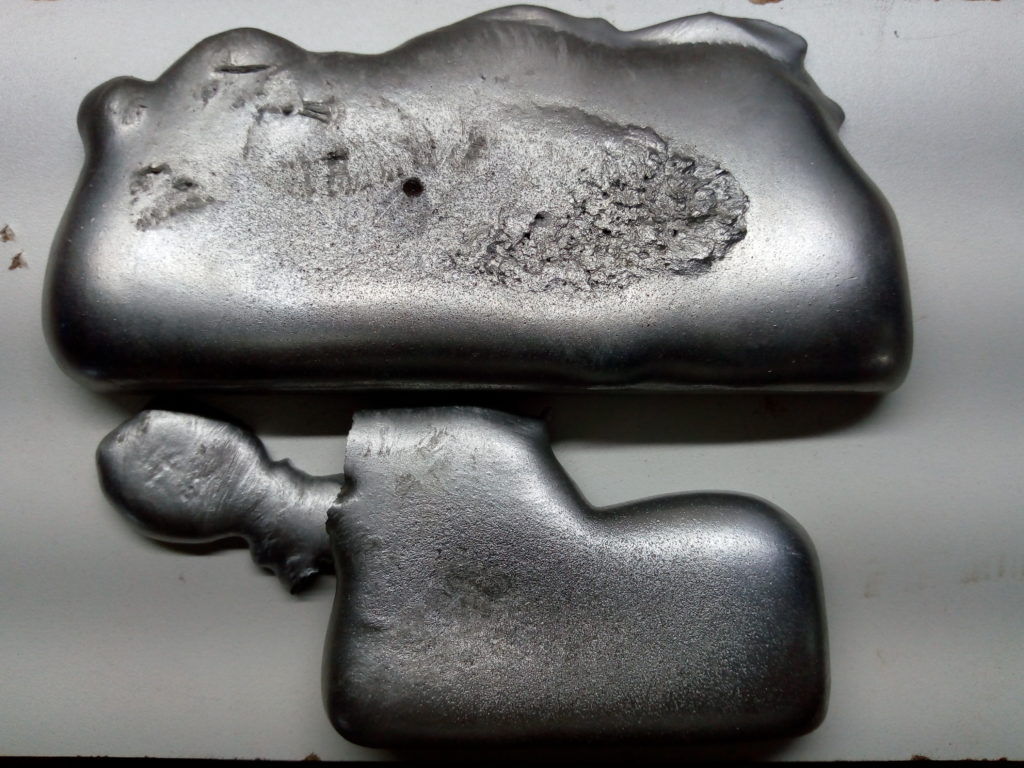
(And also fire up the tig welder again now that I have a full bottle of argon.)
Yeah, it looks passable. But doesn’t work at all.
While building it I made (again) the same mistake of not getting the screw out after tacking the nut. And so, between the galvanized coating inside and the different expansion of the nut and the threads on the plate, the screw was firmly locked.
I waited for it to cool, applied penetrating oil and only managed to turn it a bit. I kept torquing and lo, it snapped. This is not a puny screw, it’s a stainless M8.
I welded a nut on the other side and again it snapped.
Then I ground it flush with the nut on the plate, affixed to the original end and tried again. This time just as I felt it about to give and break, it got loose and came apart.
Jut a little twisted.
