Every diamond starts as a lump of coal.
We needed a new stove for a long time and the other day I spotted this in an auction house for a fair price:

And with some care it ended up like this:

Every diamond starts as a lump of coal.
We needed a new stove for a long time and the other day I spotted this in an auction house for a fair price:
And with some care it ended up like this:
For the last couple of weeks I worked on building a steel version of that fixture in order to hang some cable trays and a couple of other things.
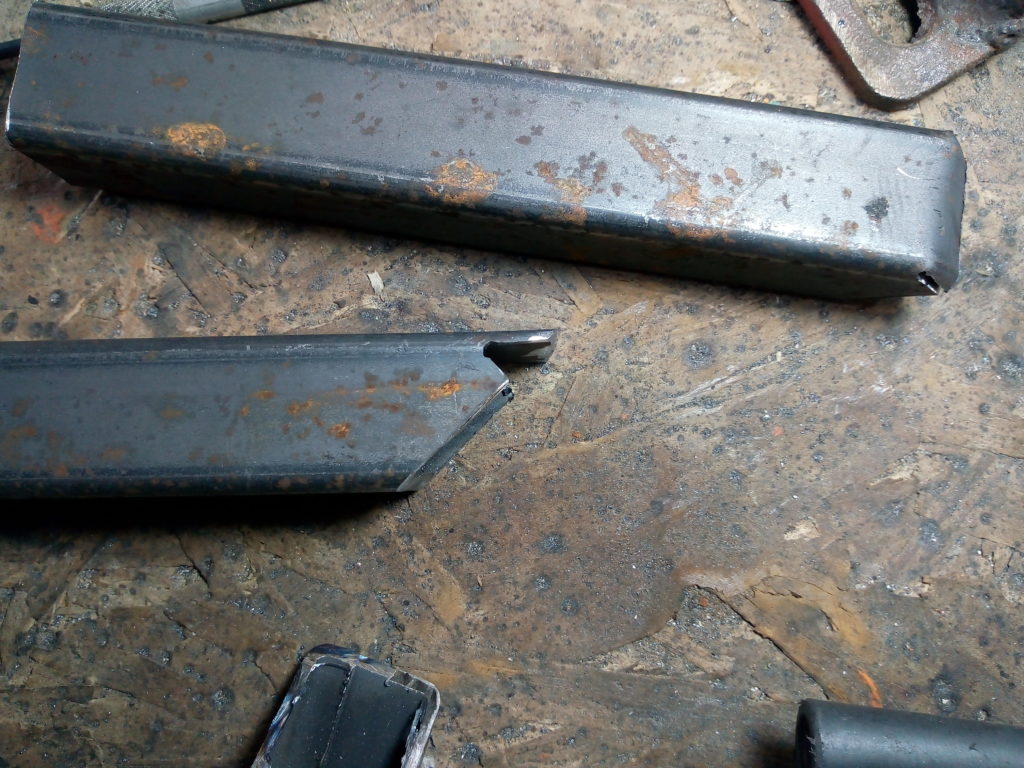
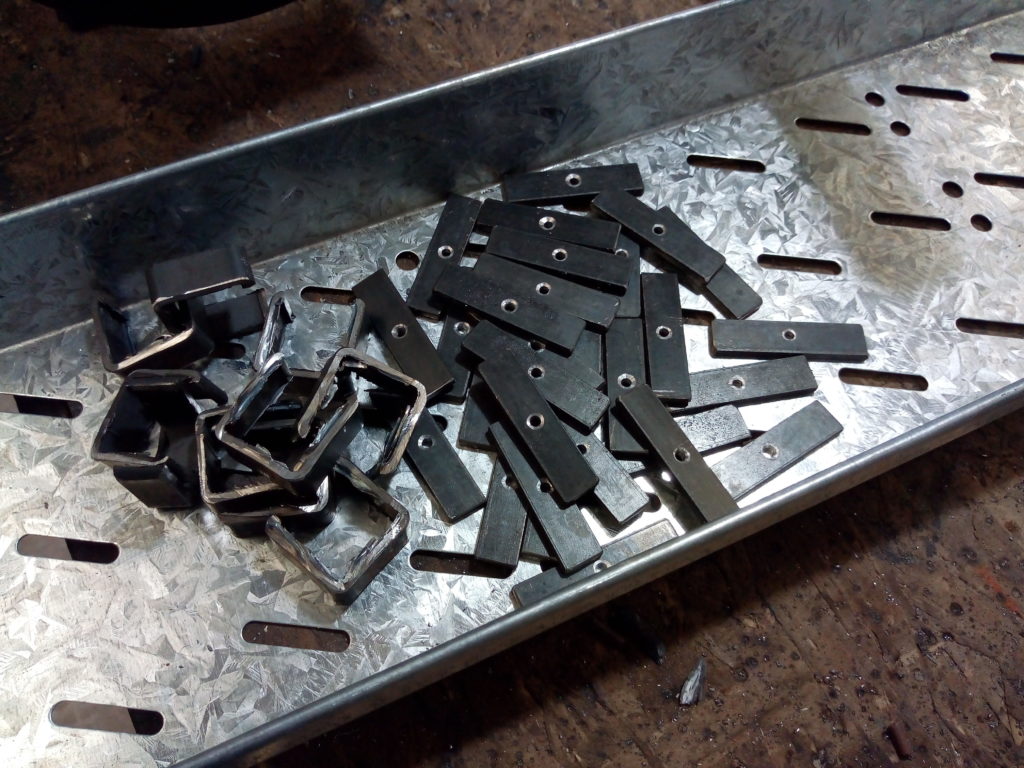
After a bit of measuring I prepared all the cuts. For the sides that aren’t at a square angle I left a bit of extra material to fold over the corner. The clamps for the trays will be made with cutouts from square tubing to have a consistent size and some flat stock. I spent quite a bit of time on this phase but I’m pleased with the outcome.


For this welds I tried as much as possible to either manipulate the rod with my left hand only and sometimes with the right, but I still need a lot of practice with that. Some were awful, but others like this one are quite passable:

A quick test fit and everything fell into the right place. I love it when a plan comes together.

If there’s a heaven I think I visited it today.
After running a couple of errands early in the morning I headed to Lisandro Olmos on the outside of the City to buy some scrap metal for my welding classes.
A couple of members of the group said good things about Grúas Mársico so I went there, it was also a good opportunity to travel a bit on this part, as I don’t know almost anything about it.
As I entered the warehouse I became speechless. There are shelves that extend up to the roof with parts from all kind of machines neatly organized on one side. On the other pieces of metal plate and tubing. Some big planers, milling machines and spot welders among them. And on the background, the tallest pile of industrial waste I ever seen in person. All of this on sale by weight save for a couple of weird stuff.
The shop was run by a very nice lady and her brother. This morning I only bought some iron but the next time I come around I’ll bring a small truck to pick some very , very interesting stuff.


A while ago we bought a very nice set of chairs with a chromed base and the bog standard pneumatic height adjustment.
After a lot of use a couple of them had the welds on the base break apart. I took one home and after thinking a bit I chose to make a stiffening plate instead of just redoing the missing parts as that area looked very flimsy.

I traced the outline on some cardboard and then cut a bit of plate with the plasma torch.

Some light prep and careful welding made it usable again. I tried first with a small 6013 rod but the arc wandered and blew a hole through the thin base. I had more success with 7018. The welds look horrible but are strong enough, I jumped a couple of times and it didn’t even notice.


I still need to practice a lot but my 1F is looking better


Sometimes I use wire cups and wheels on the grinder. Screwing them is easy but the clearance between the guard and the tool makes it very cumbersome to use an ordinary wrench to loosen them. And also they come in different sizes.
So instead of having to carry around two tools that aren’t fit I fashioned one with some flatbar. The welds are pretty enough for a beginner and this application.


After that I gently heated it over the stove to reach a lovely shade of iridescent blue:

We are installing an intercom system and the front door unit is meant to be mounted in a recess in the wall. But the problem is that that wall is not really suitable for making such a hole.
I cut some strips of flat stock and fashioned a box. It has a couple of tabs to bolt into the wall and another ones threaded to hold the device. This is going to be painted later but I love that blue shading.


I’ve been working on and off on this for the last couple of weeks. The space we’ll have on the comms rack to handle the wiring isn’t that great and I saw on a couple of places patchbays that are articulated.
I thought on adding a twist to that and mounting everything on rails. This way I can slide it from behind the rack and then unfold it, gaining access to both sides.
We bought some pre-drilled (but not taped, ugh.) angle with the holes spaced in standard units, that was welded into a fixed frame with a couple of hinges.
This will hang from a small cart with iron wheels that rides on a couple of rails fixed to the walls.


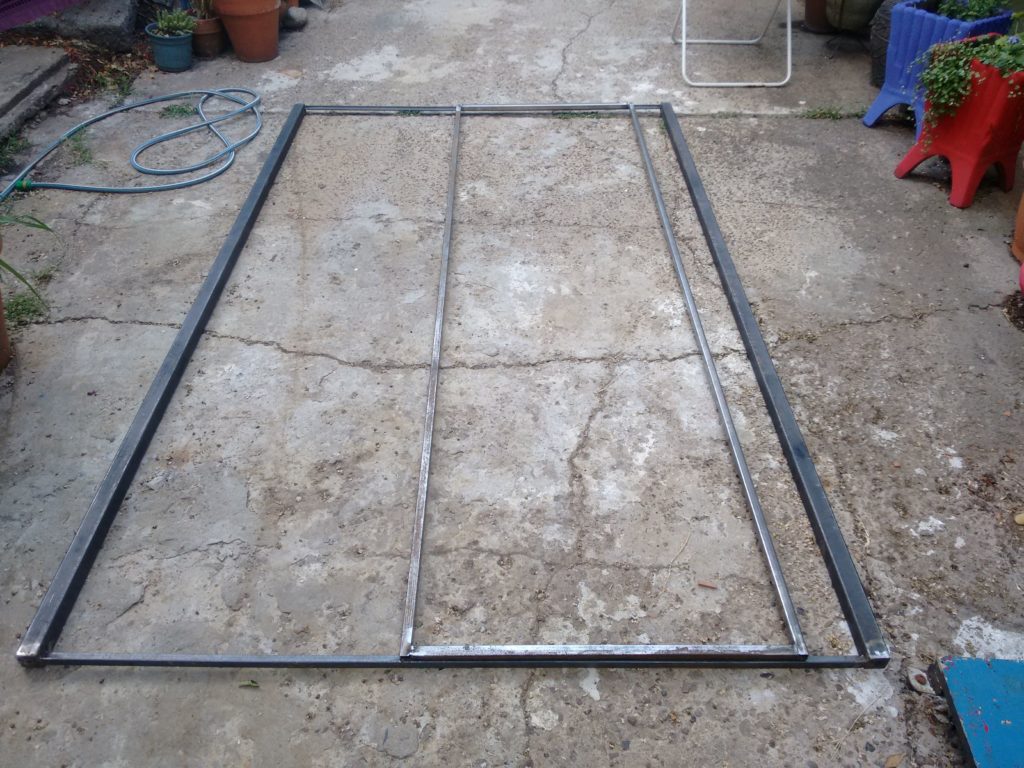
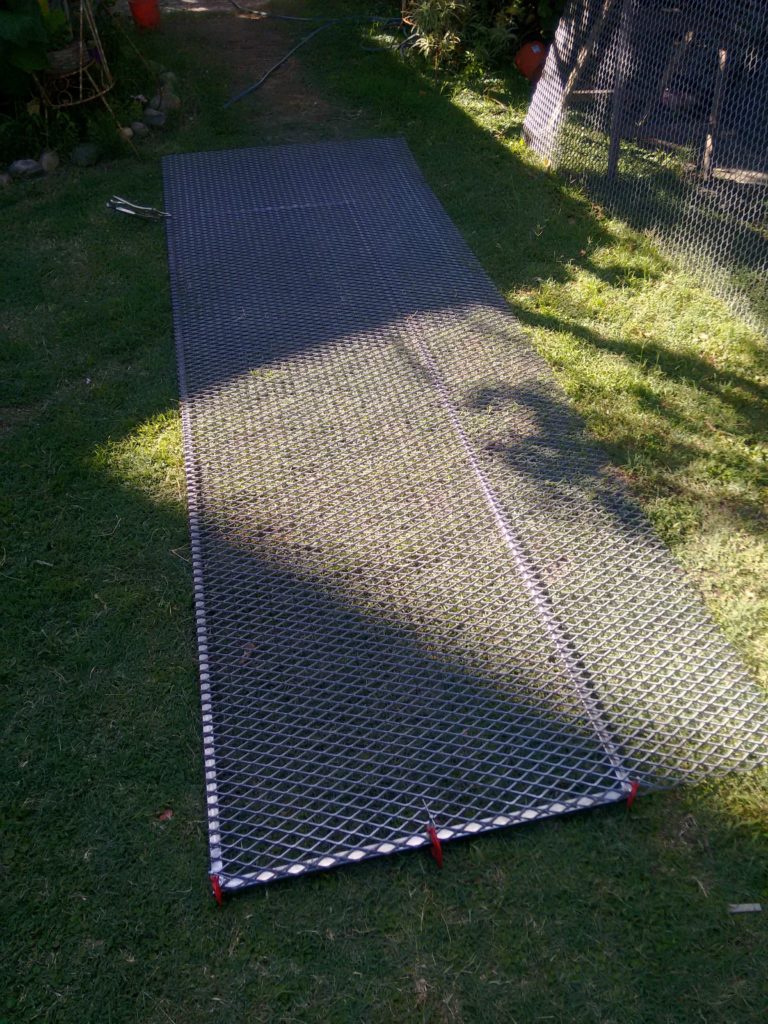
With the outer frame already built I continued with the doors. During the last couple of days I made the frames, aligned the hinges and had them welded. I also started to cut the expanded metal for the body and made a couple of simple handles.


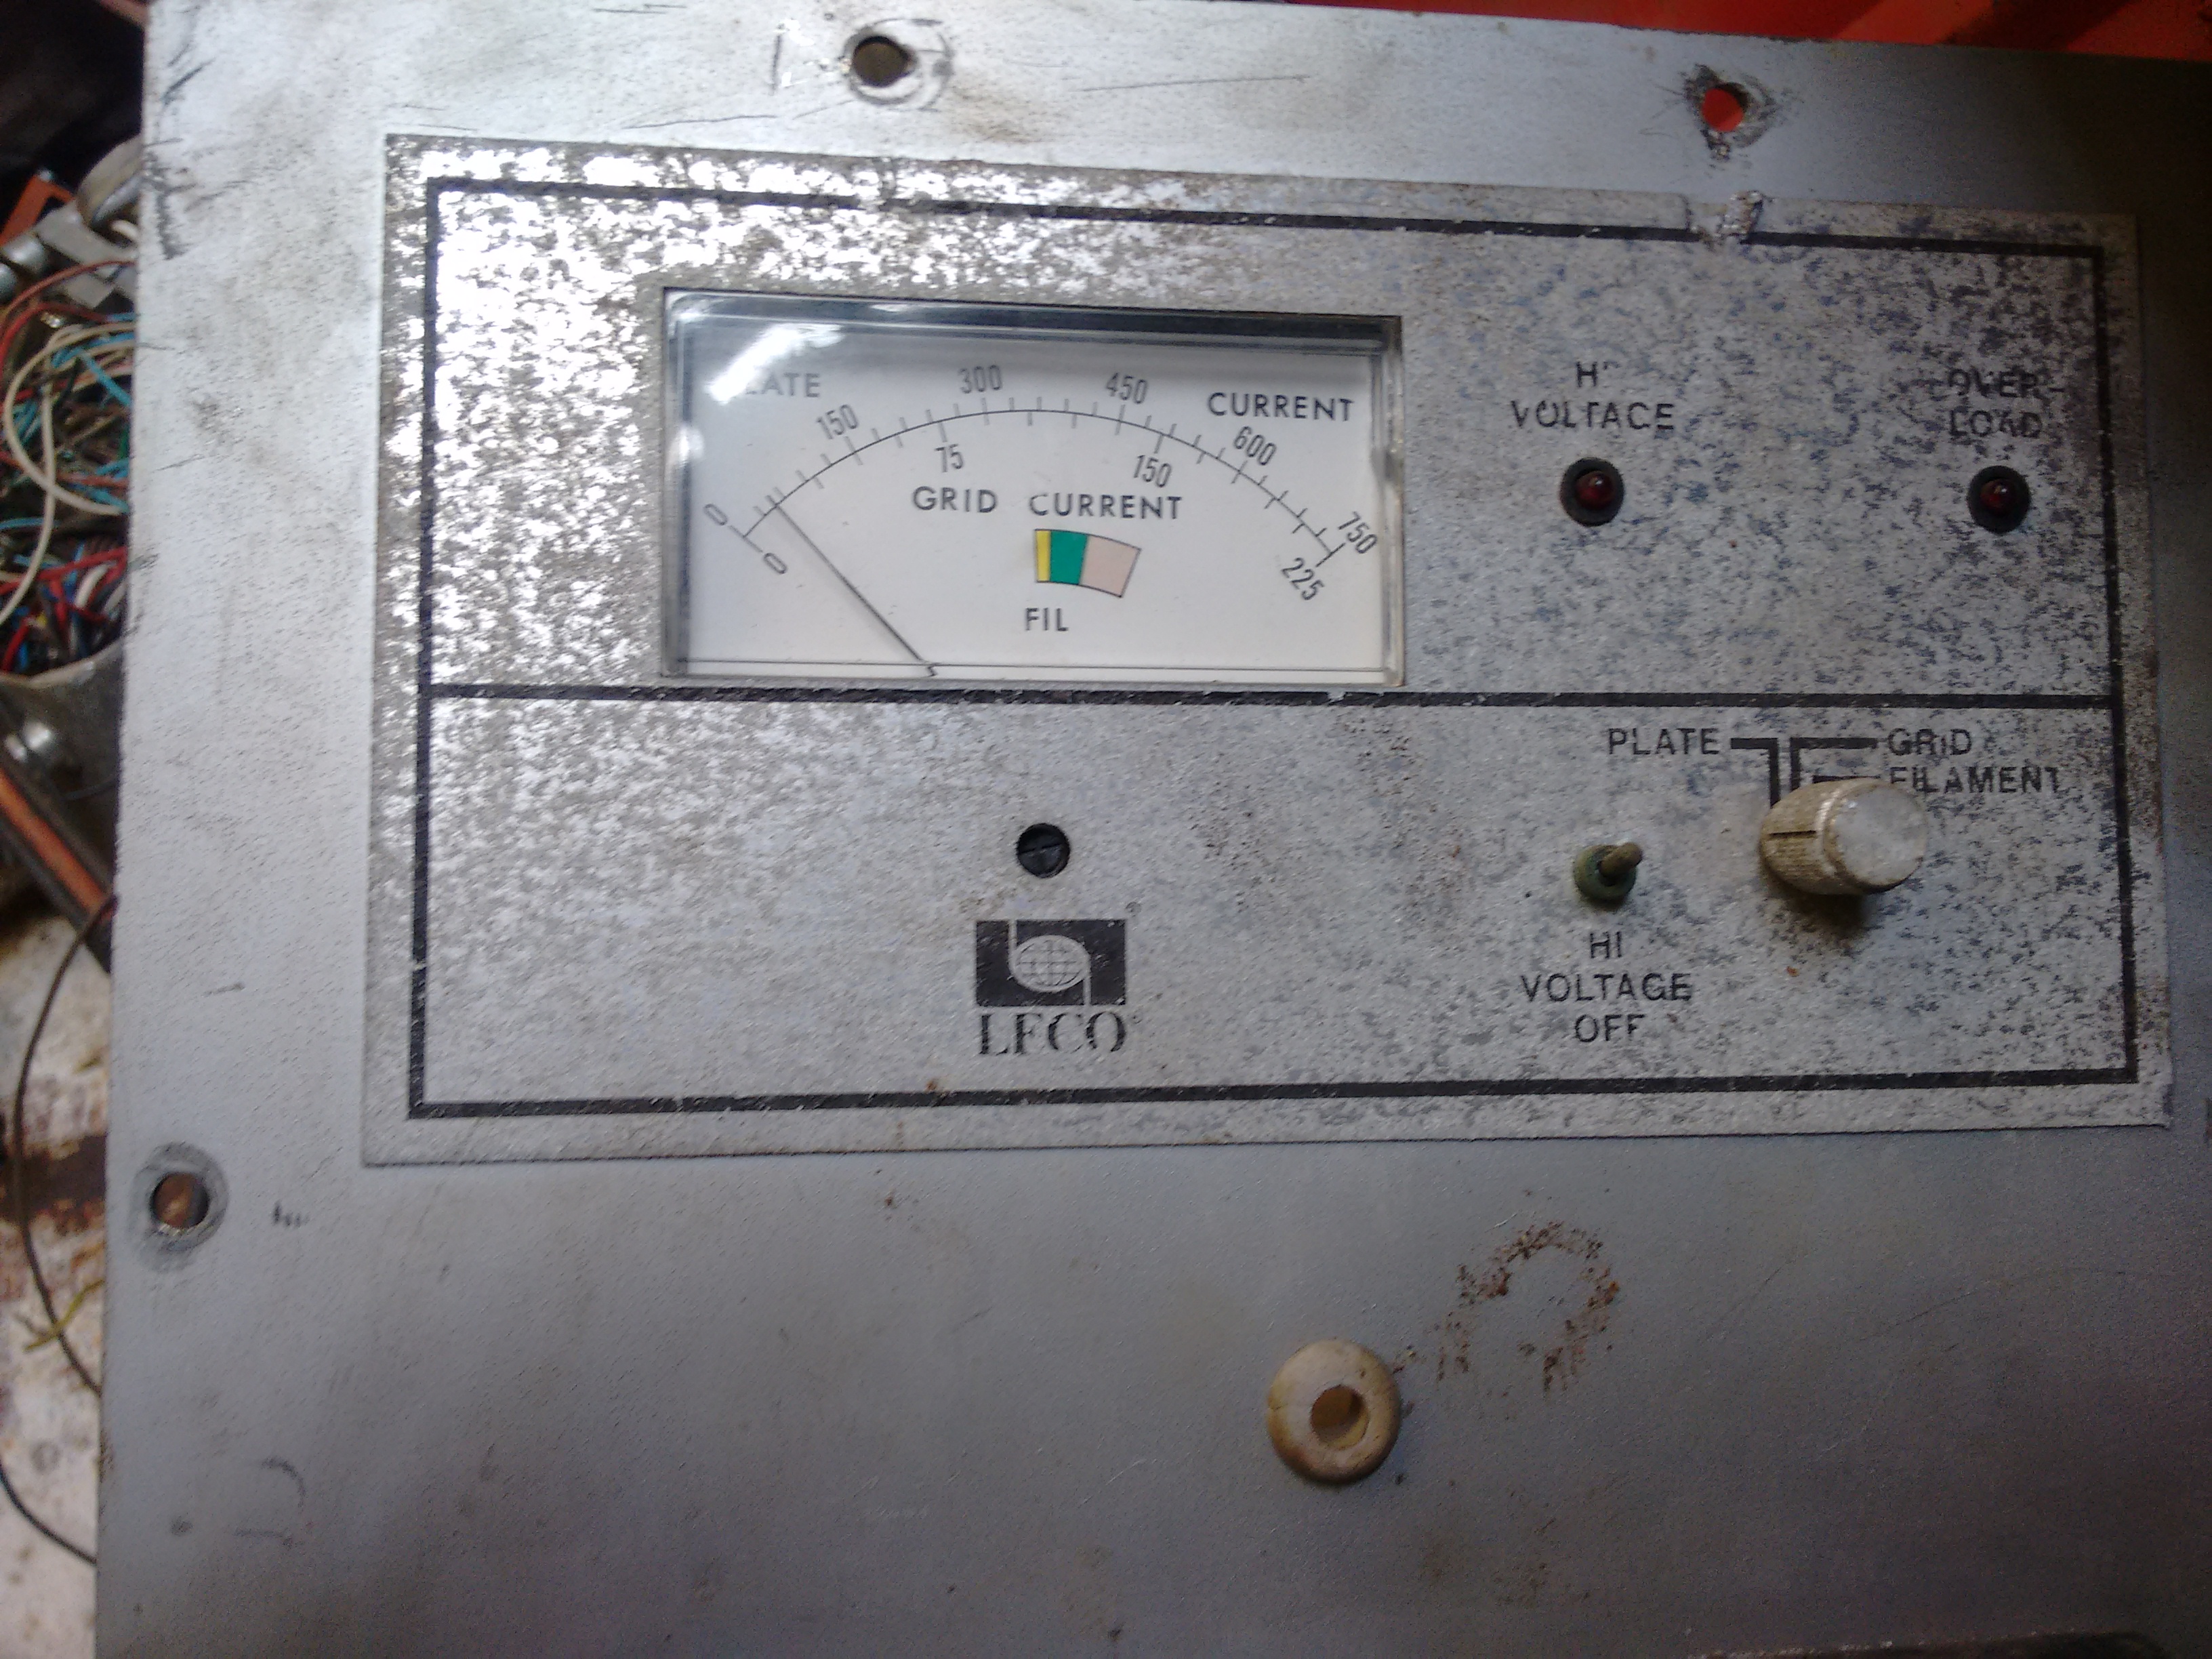
Today while working on the rack closet the welder died on me for no apparent reason. But, after power off it made a couple of noises and the fan ran for a moment.
For being a Chinese machine it actually looks quite good and neat on the inside. The boards have conformal coating and just a tad of flux residue on some pads. The only thing out of place was a blob of solder on a header instead of a jumper.

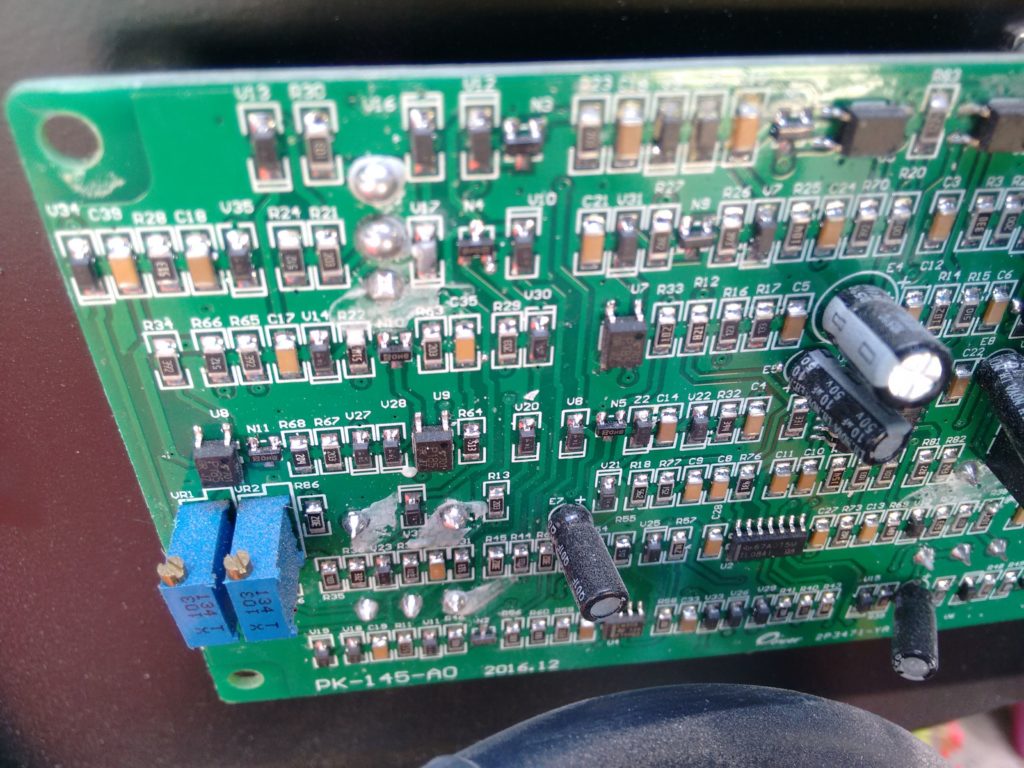

I made a couple of measurements, the high voltage section was fine but the control supply was totally dead, except for a brief moment when turning off the main switch. Traced back from that board until finding a small block with a forward converter (kinda odd, I expected a flyback). The only component with bad readings was the recovery diode. I swapped in an UF4007 and at the next flick it was alive again.
Of all the things that could go wrong with a welder on novice hands this was not expected.
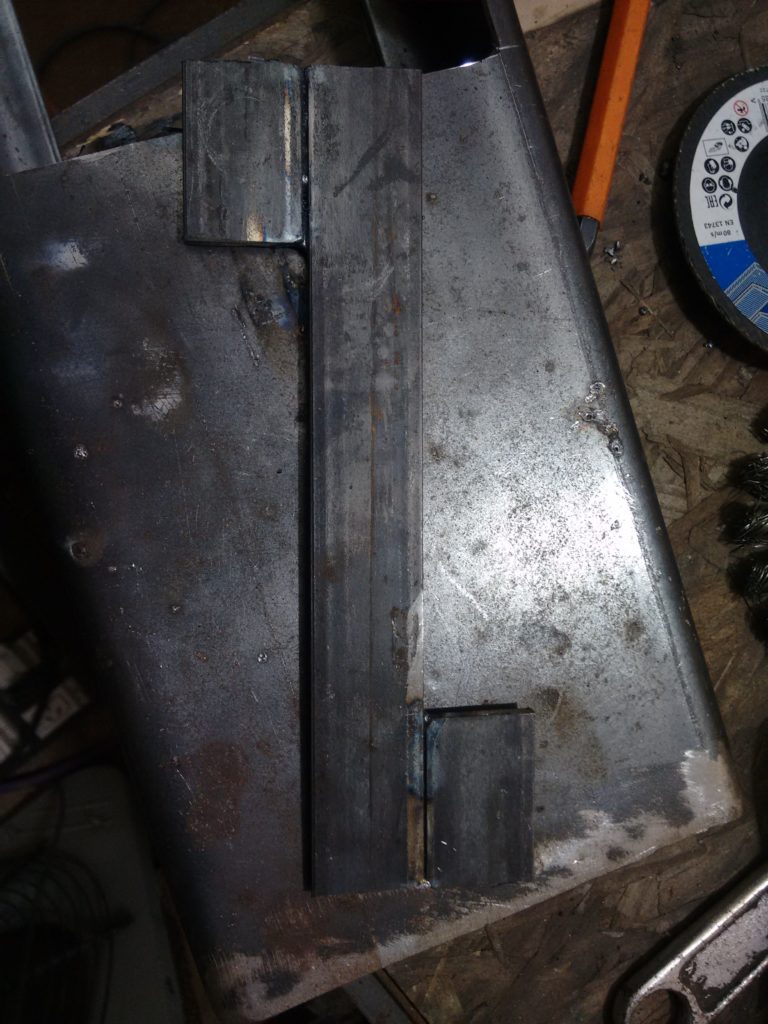
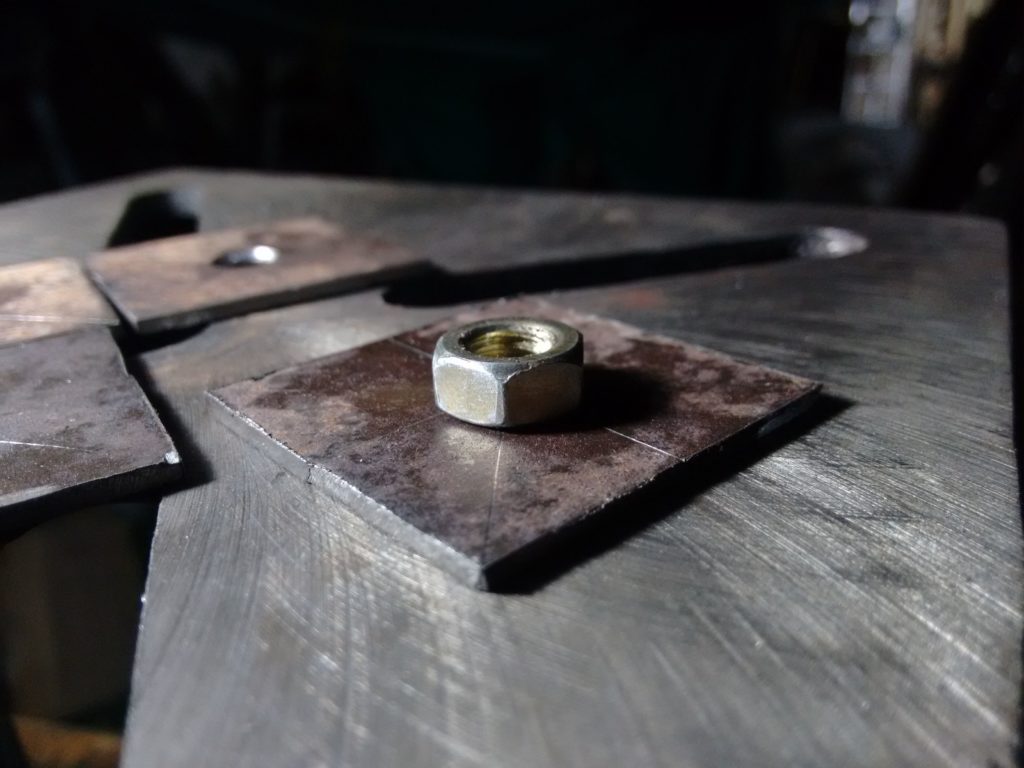
The next step in the making of the rack closet is the front door frame. It’ll be screwed to the base and the top support. For that I’ll use some square tubing with a cap and nut welded to each end.


The lines scribed on those pieces look a lot like the iconic map of La Plata.
Each one was beveled and welded in the tubes. I ground the sides flat mostly for looks.


As I still had a while more with sunlight I used the support built earlier to keep them in place and tack everything together. Enough work for a Summer Friday.

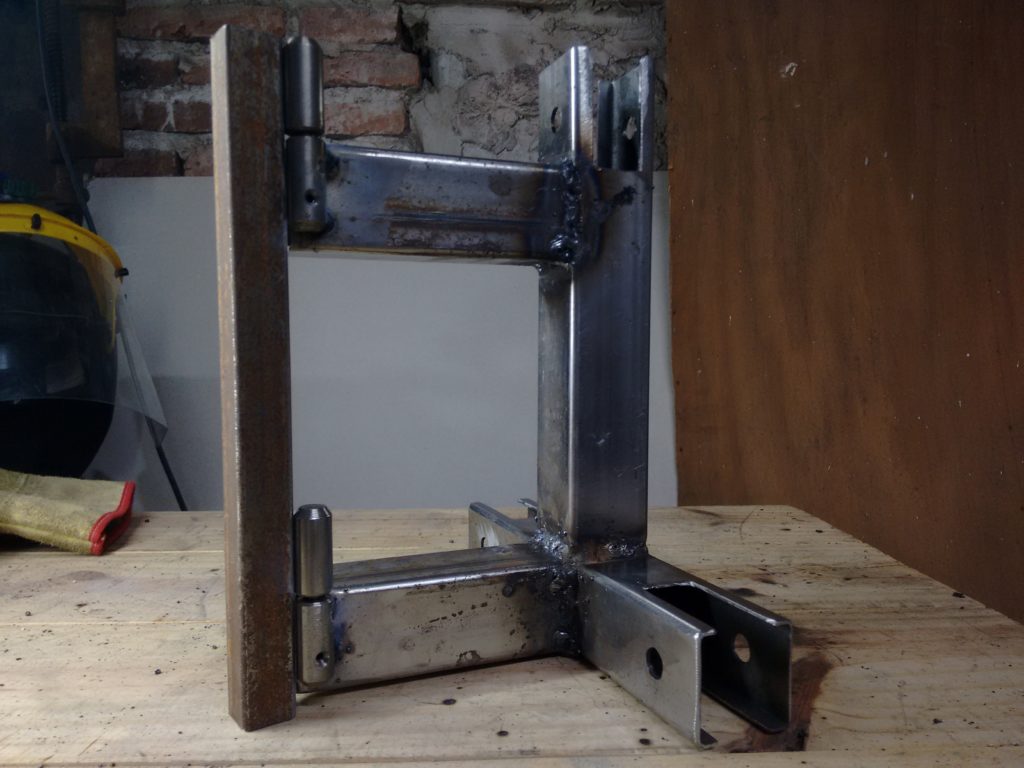
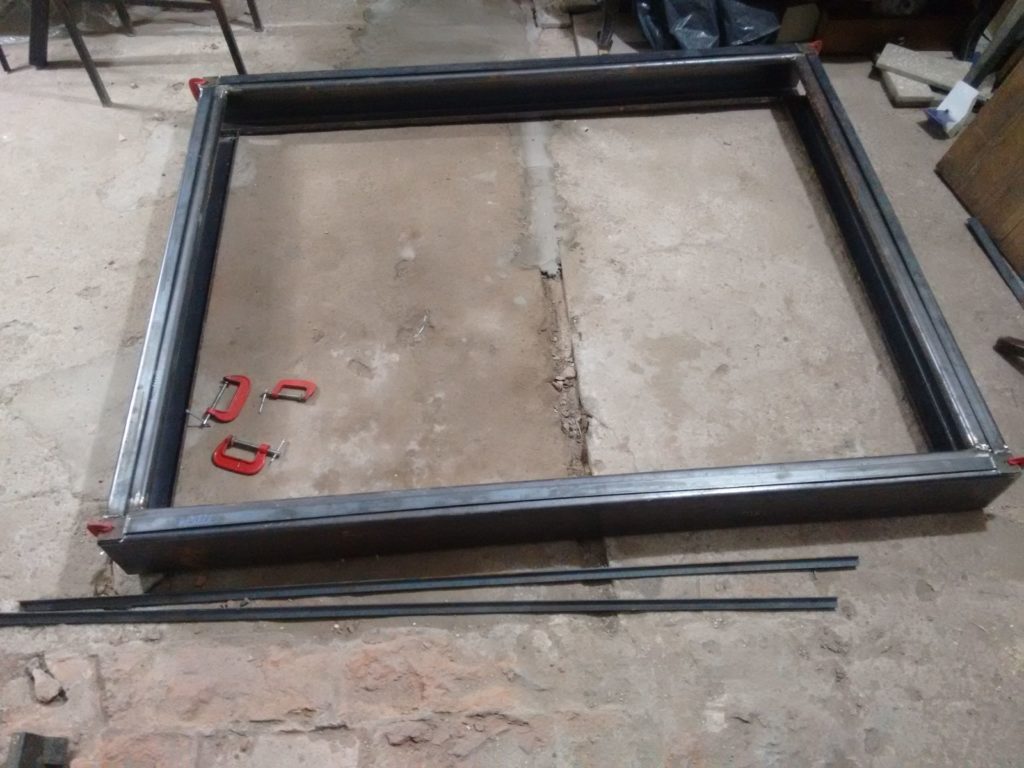
So, after tearing down part of that wall we needed a safe way to store the equipment. It also has to be a bit above floor level, as we plan on making a small stage.
For the base I used some C channel iron. Parts of it were a bit mangled, so I made a makeshift tool with an hydraulic jack to spread its sides and have a good fit.


The top is simpler, it just needs to hold the vertical struts in place and the light fixture.


Then I centered it on the base and proceeded to punch and drill the holes to locate the rest of the structure:
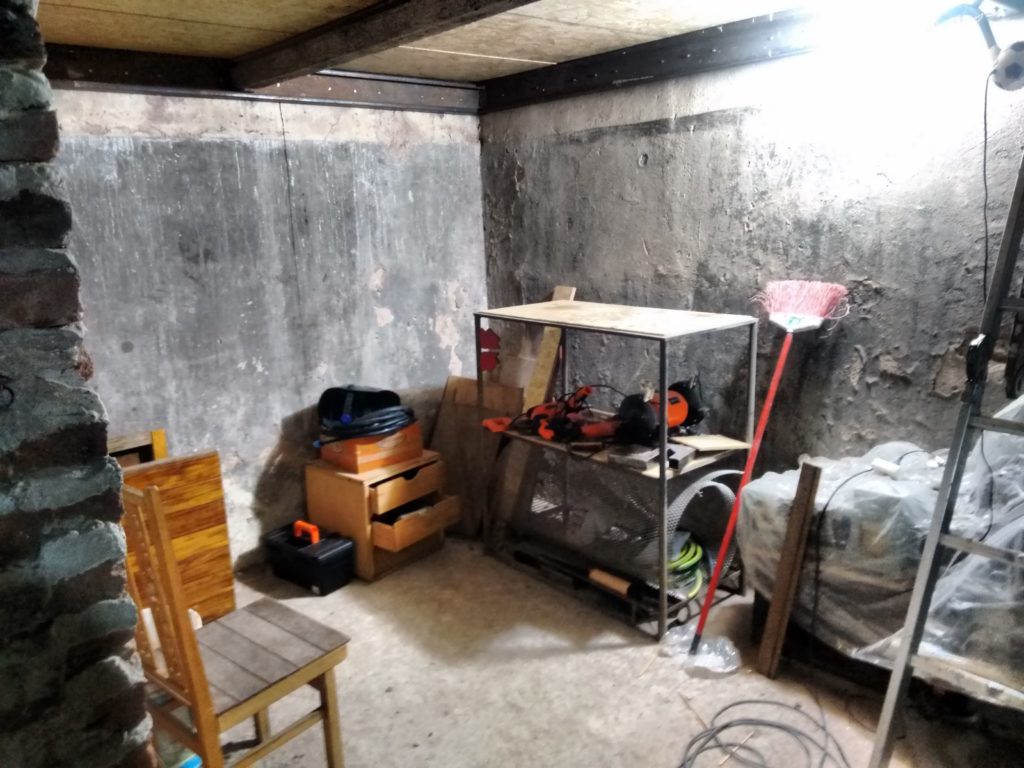
After making a lot of room on the shed I still had this feeling that the space was under utilized and I started to think of a small raised platform of sorts.
As luck would have it I had some leftovers of C channel from another project and they are perfect to make a frame and put some osb boards.
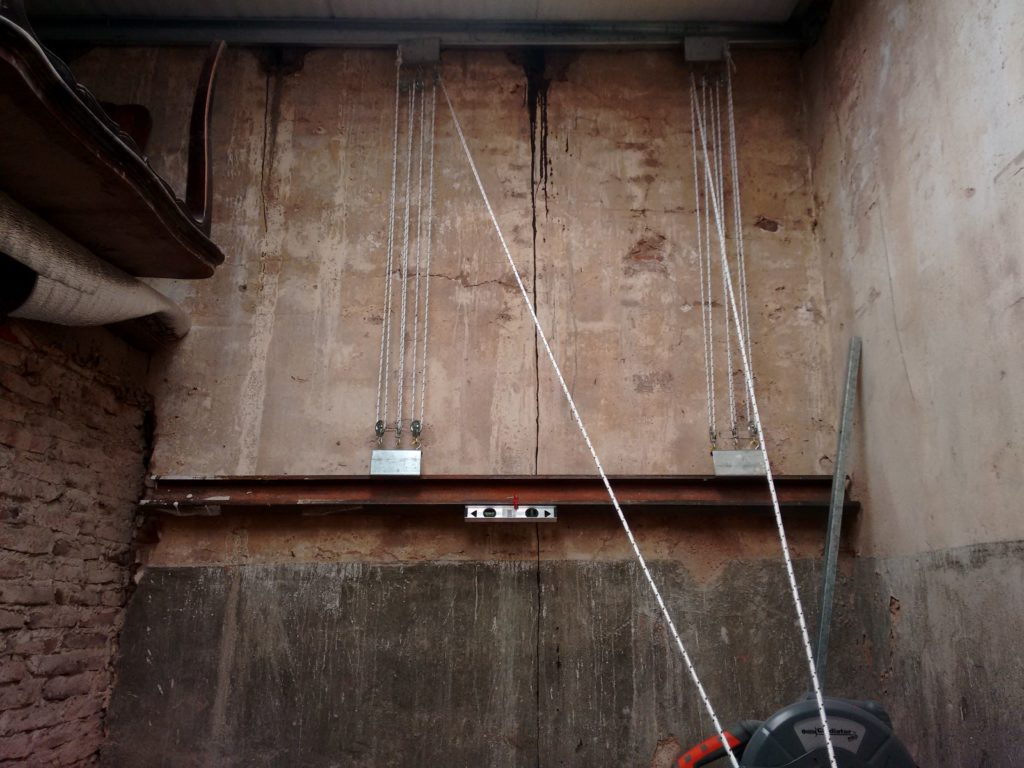
They are a bit cumbersome to handle by myself so I built a couple of hoists with some sheaves and scraps.

This proved to be extremely useful not only to lift but also to keep everything in place when drilling the wall.


It took a couple of days but I finally managed to make it with a bit of help from my dad.