I still need to practice a lot but these ones are not dull anymore and cut more or less similar chips on both sides.

I still need to practice a lot but these ones are not dull anymore and cut more or less similar chips on both sides.
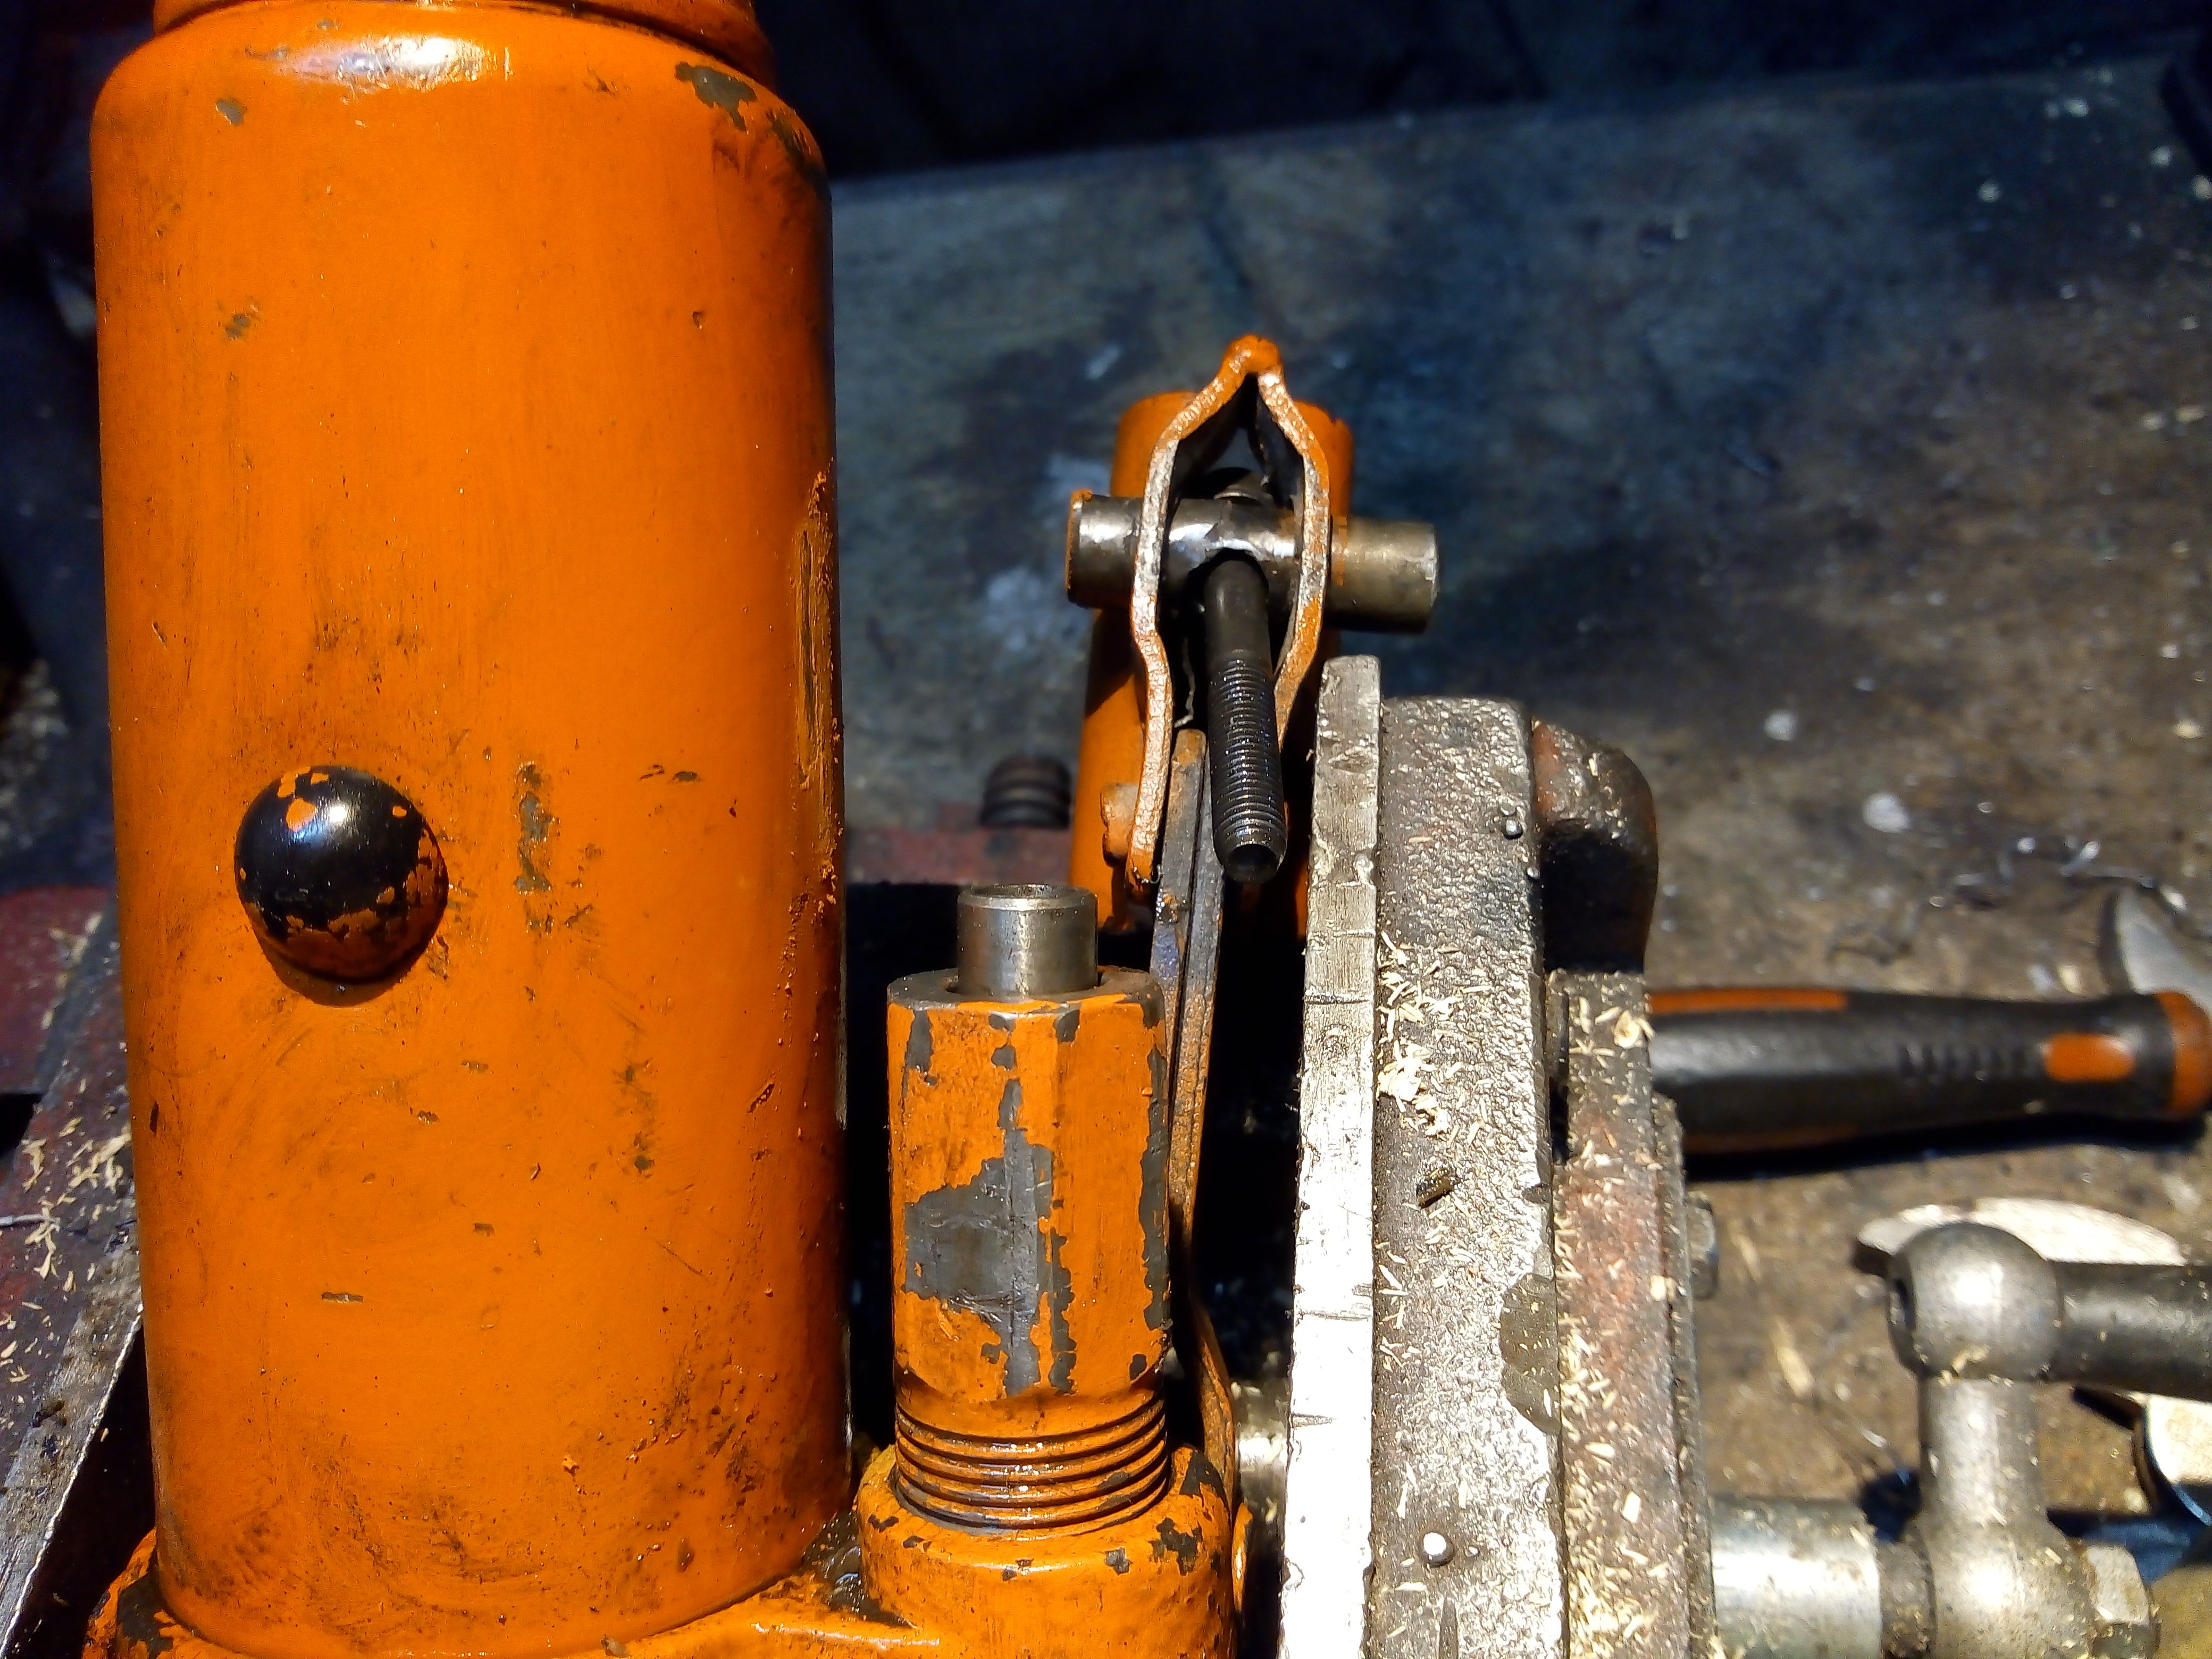
Long ago I won a lot of used tools at an auction. Among them there was a small two ton jack.
Overall it was in fair condition but the lever was really hard to move, so I left it with other low priority things to repair.
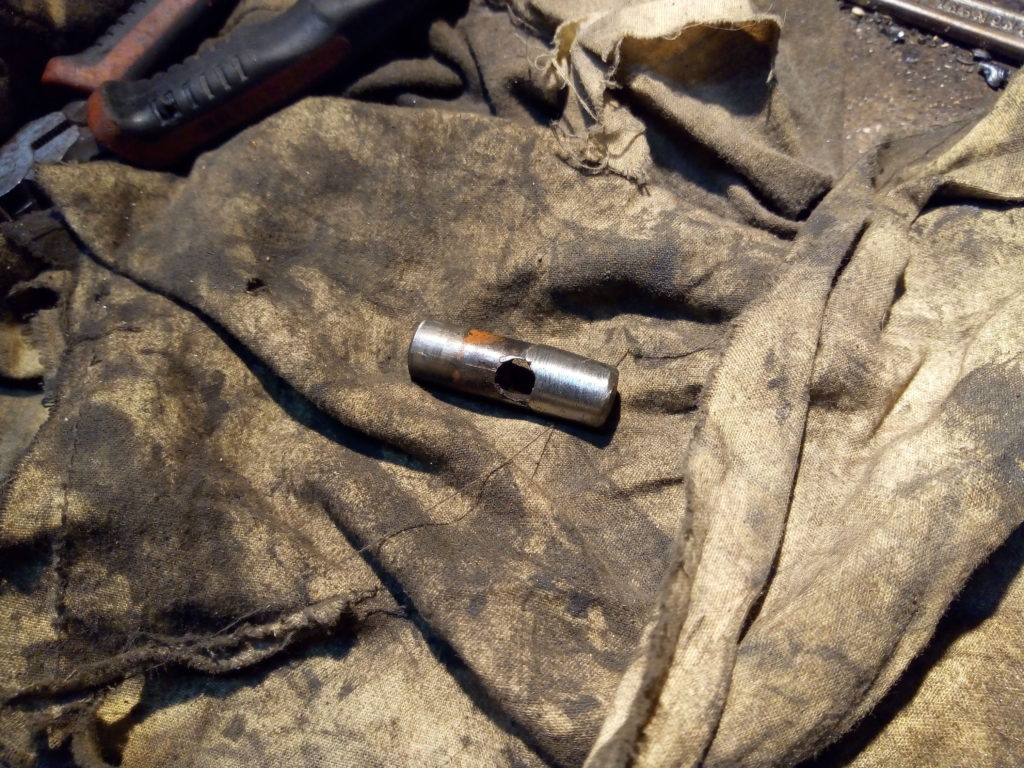
Upon a closer look the smaller piston was bent. I chucked it into a vise and tried to loose the nuts but they were firmly stuck.
I cleaned the base with a rag and wire brush and then welded it to a piece of iron channel. I love 6010 rods. I also learned that whatever was used as hydraulic oil catches fire with ease.
Laying on the floor with one foot on it I used a big wrench and a hammer, this time succeeding in getting it apart.

It doesn’t seem like much but this small curvature made it almost impossible to pump:

I decided against straightening because with the tools I have at hand it would be very certain that I’ll scratch the good part of it and thus completely ruining the jack. So I cut the bent parts with an angle grinder.
Just by chance the parts that were badly out of shape are almost the same length as some ground rods I have from a textile machine.

The plan goes like this: drill and tap the remains of the original piston, make the rod hole bigger and use a long bolt to hold them in place.


I used the cutouts and some small welding rods from the trash to make a new cross handle.

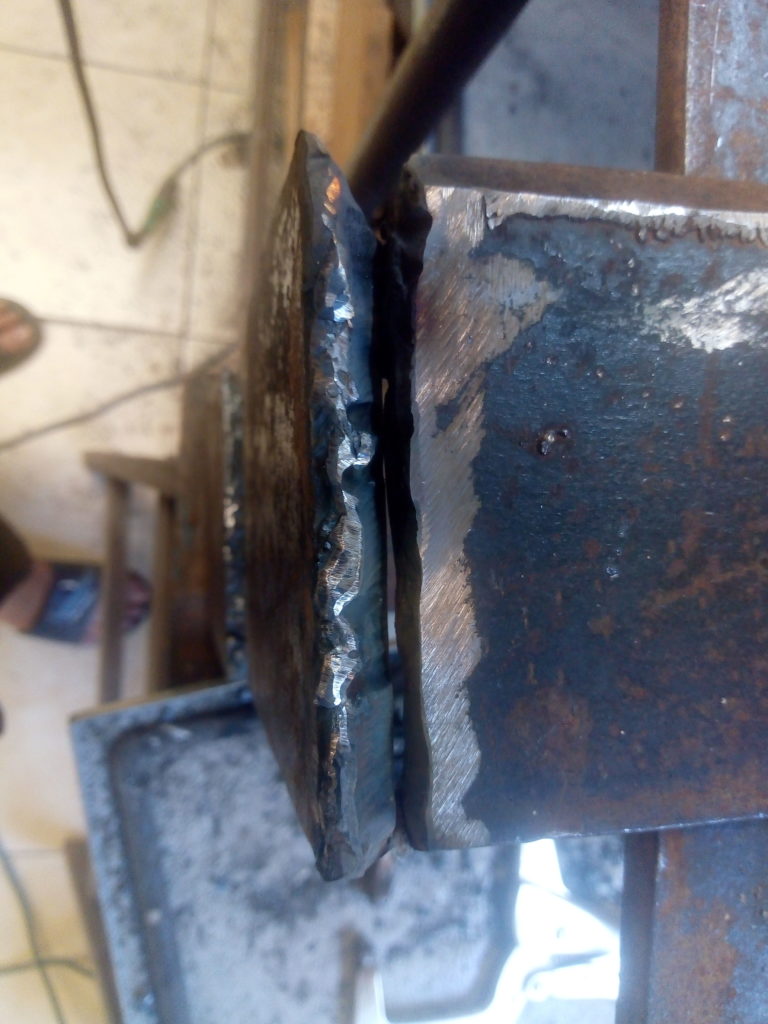
I’m very proud of that weld, the ripples and profile are very smooth and consistent. But I had to grind it flush.
This is before the final assembly, now I can operate it with a single finger.
In the last couple of days I finished the remaining welds on the steel support and mounted it on the wall with some percussive persuasion.
I made a couple of supports:
To hang this tray from the roof beams (I also made the mess of dust and bricks):
This weekend was a bit slow.
A couple of days ago I started to learn FreeCAD, mostly for its FEM analysis mode and to build a couple of construction plans.
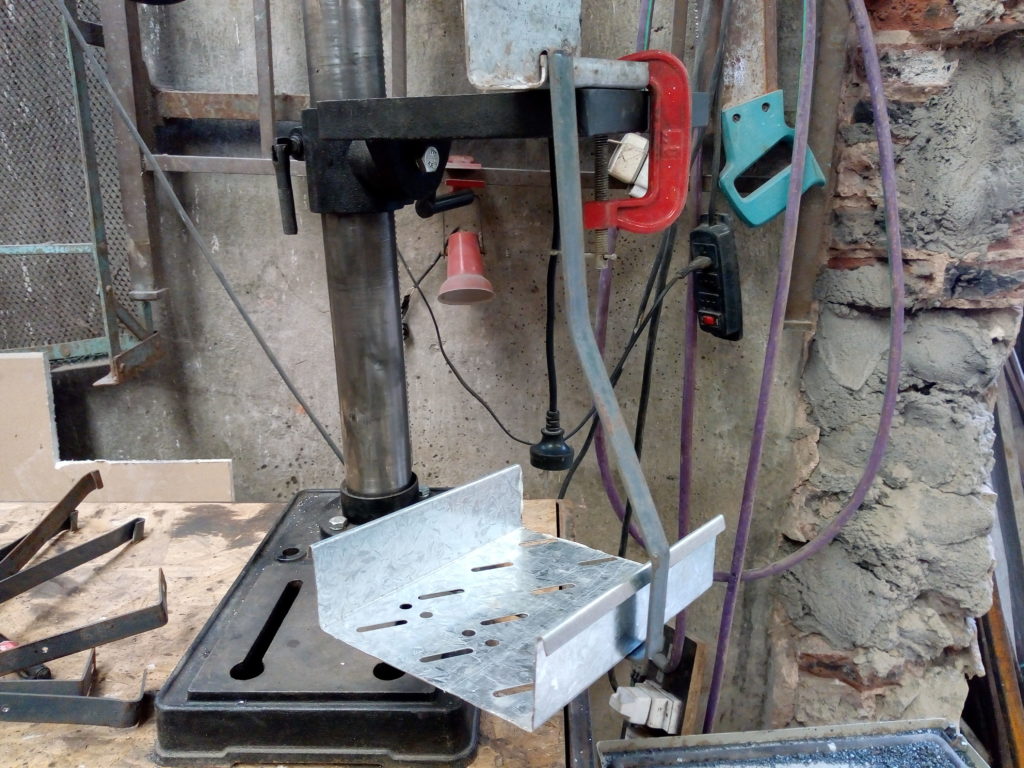
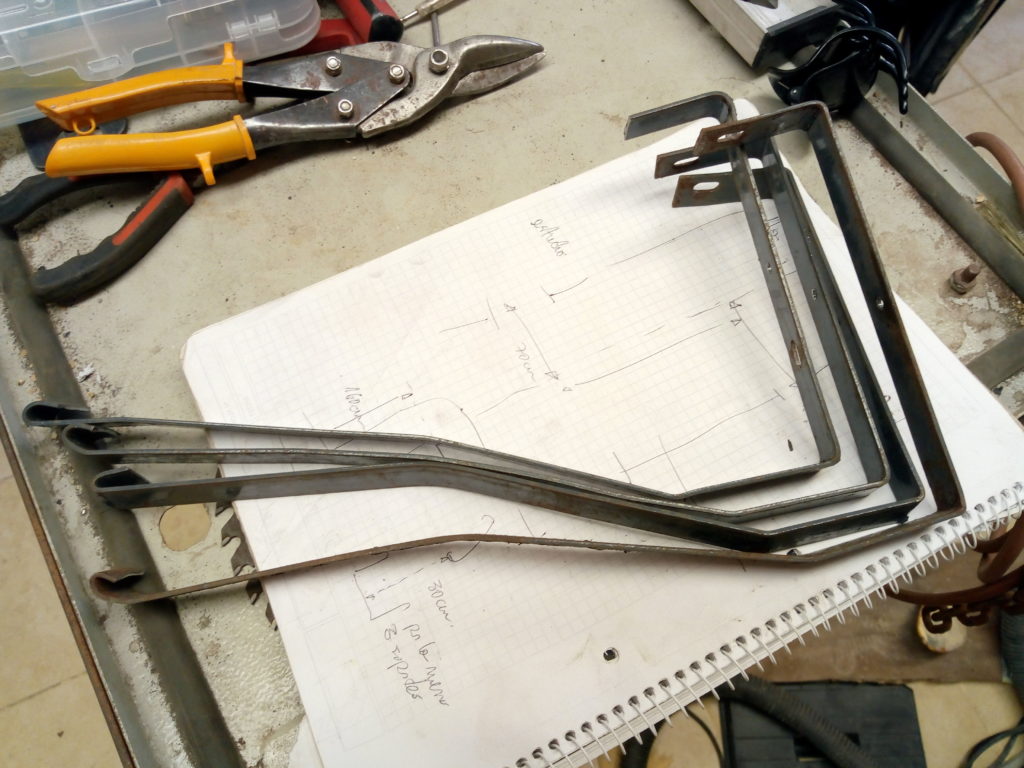
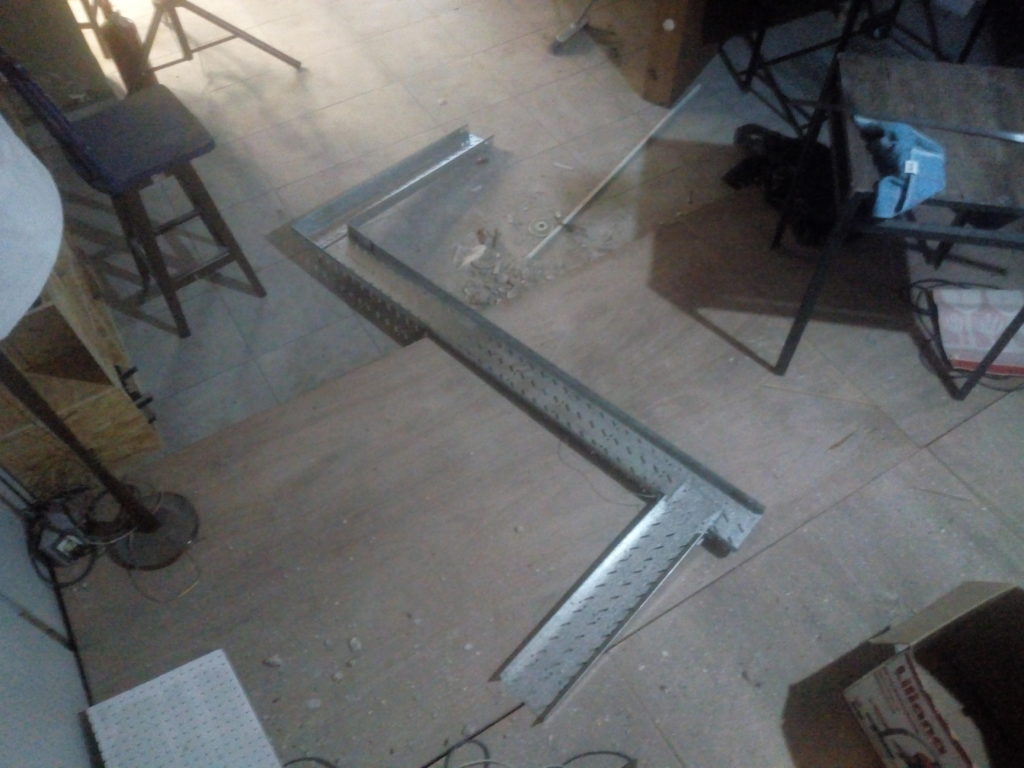
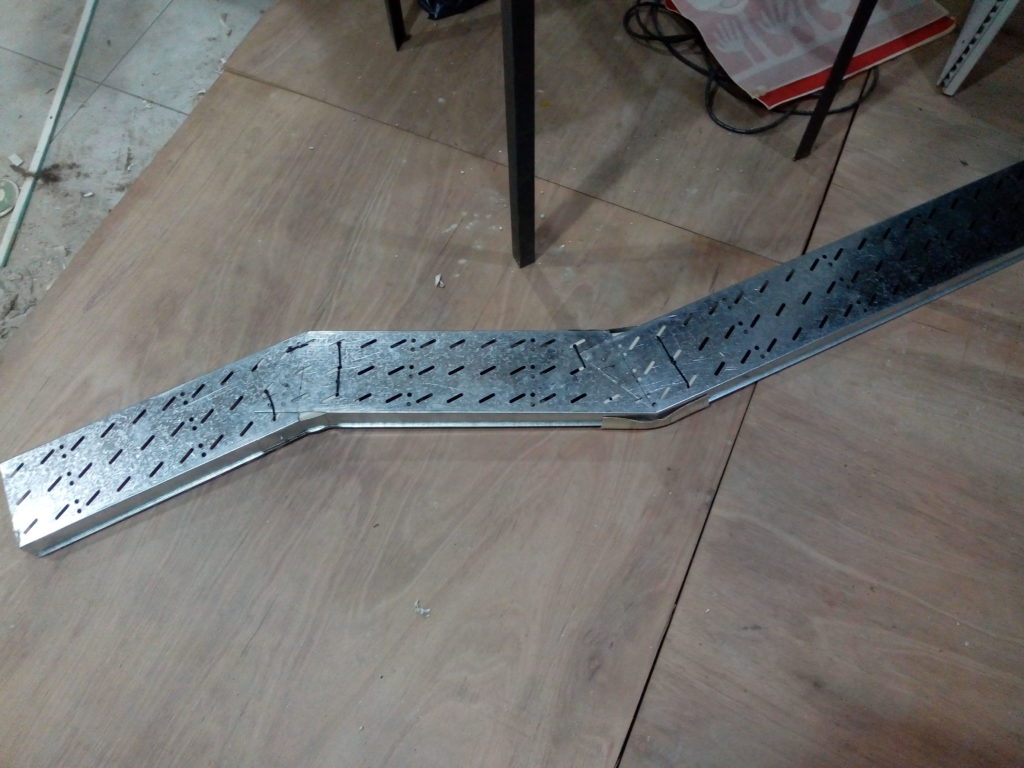
I made another part of the cable trays for our comms closet. Initially I wanted to use FreeCAD for that but at the end it was faster to do a bit of trig and sketch the cuts on paper. It’s held in place with a couple of rivets. I also added a layer of pvc to shield the cables from the metal edges. Fits like a glove.
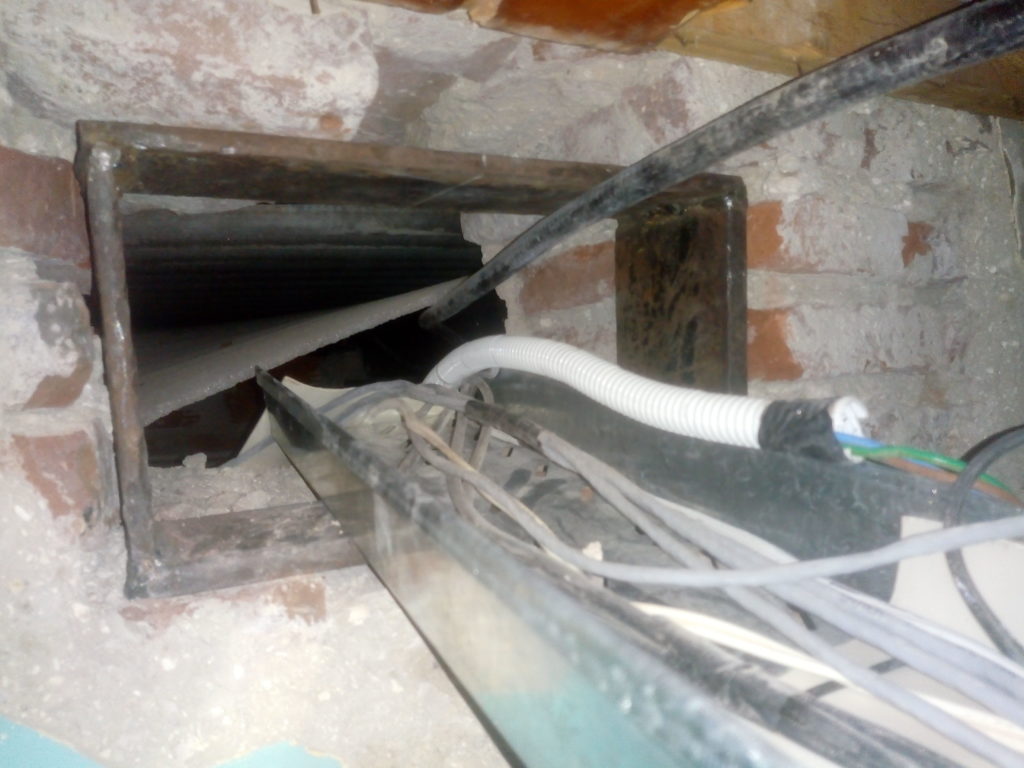
I also started to build a steel support for one of the walls. We made a big opening for cables and I’m a bit uneasy about the lack of support.
Fun with a plasma cutter follows:
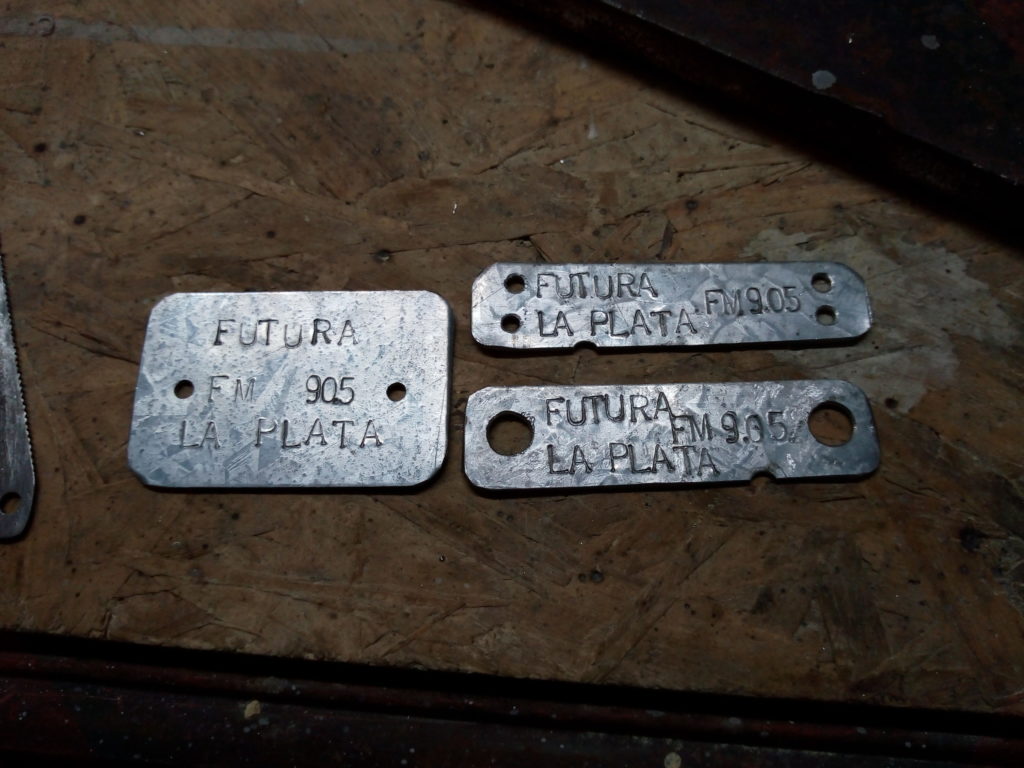
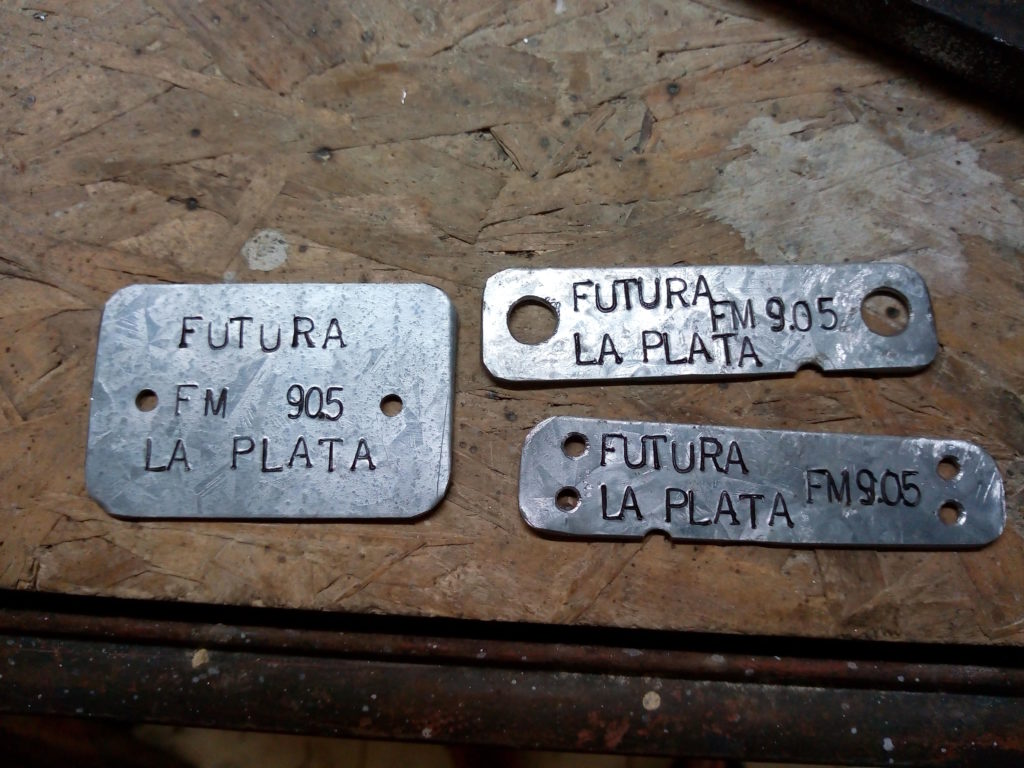
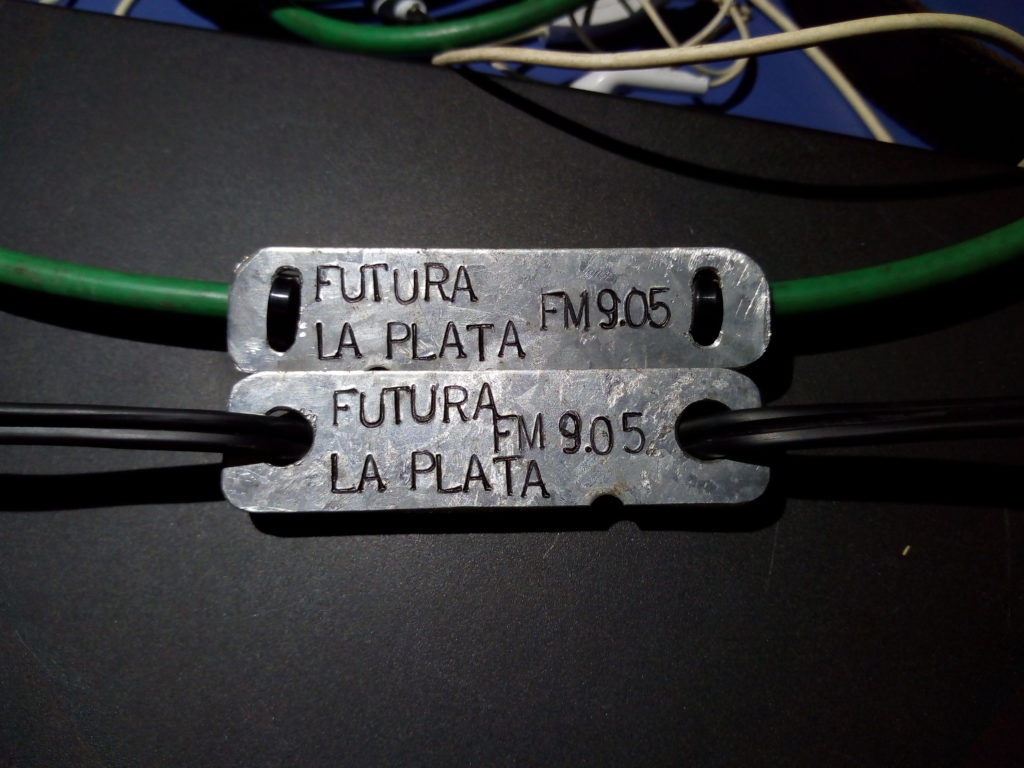
Continue readingWell the remote control for our transmitter is officially finished. Today as a last detail I built a couple of name tags for the cables and a bigger plate to mount on the front panel.
They are not only for aesthetic purposes but also to keep things where they should be, as sometimes they drift apart with strangers.
I cut some pieces from a scrap lamp and used the alphabet punch on them. They certainly look better with a small touch of permanent marker.
I like how they lay on the cables. All of this gives me an old time vibe feeling.
Today I started to build the rope guides for the lightning fixture. I have some nice ground rods from a textile machine that are perfect for this.
On the evening I went to Futura and cleaned up a bit the stage, moving most of it to one place:

Then I started to install real cable trays instead of our improvised version with halves of water pipes. I need to cut a small section with a special bend to accommodate the opening on the wall.

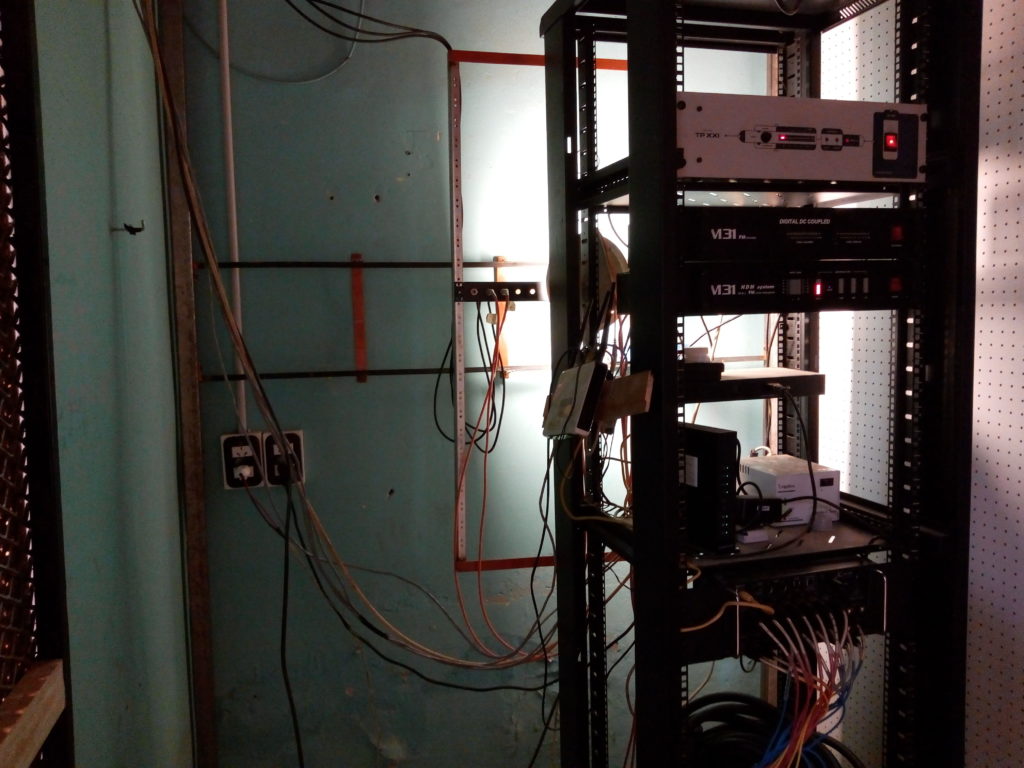
I emptied most of the rack cabinet and installed the patchbay I built earlier. I had to drill and tap another set of holes as the power outlet interfered with the movement.

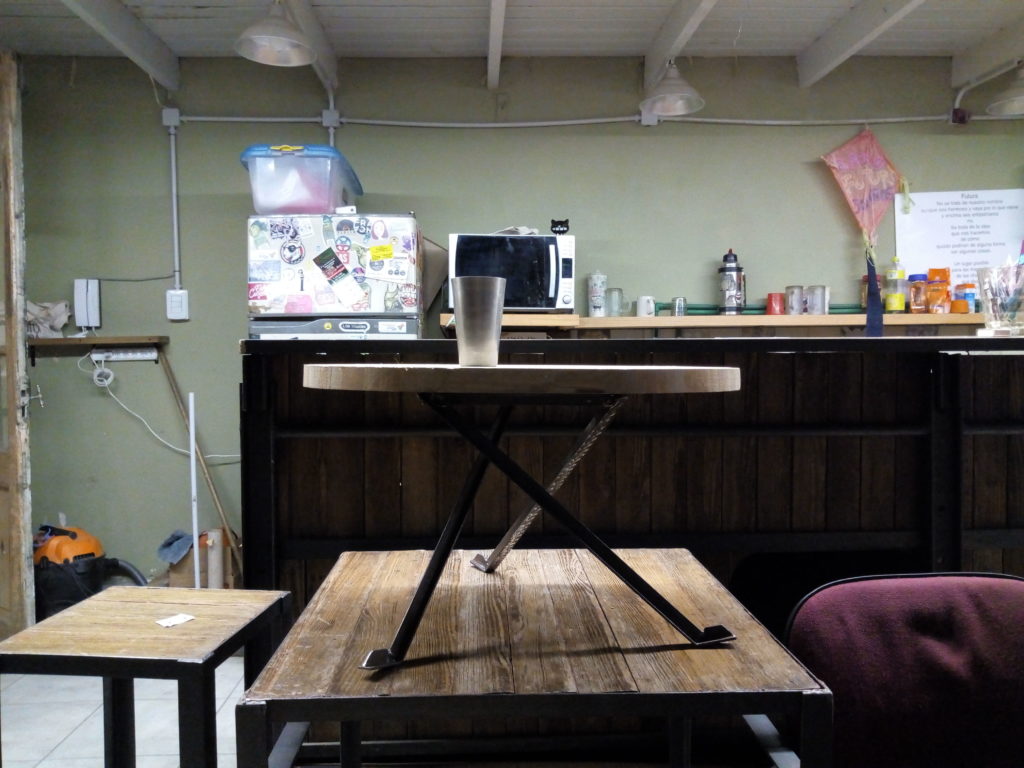
I also finished that small table:


At least for now. The next step will be adding another support for the roof frame and rollers to guide the ropes around it to unblock the light path should we want to project from there.
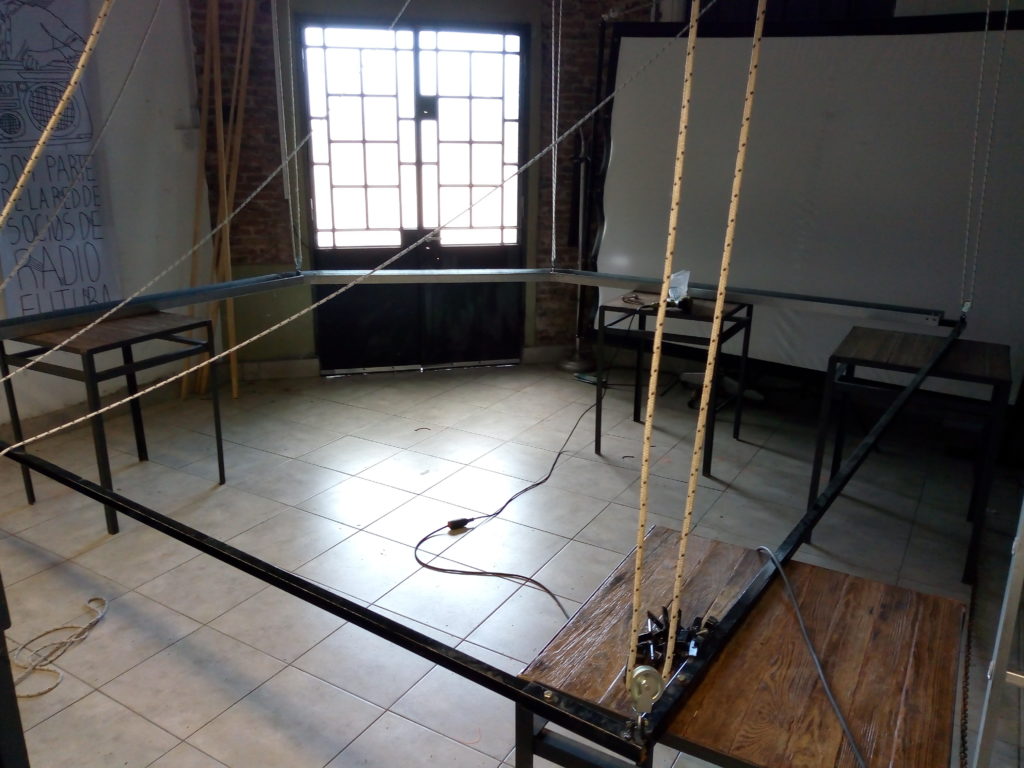
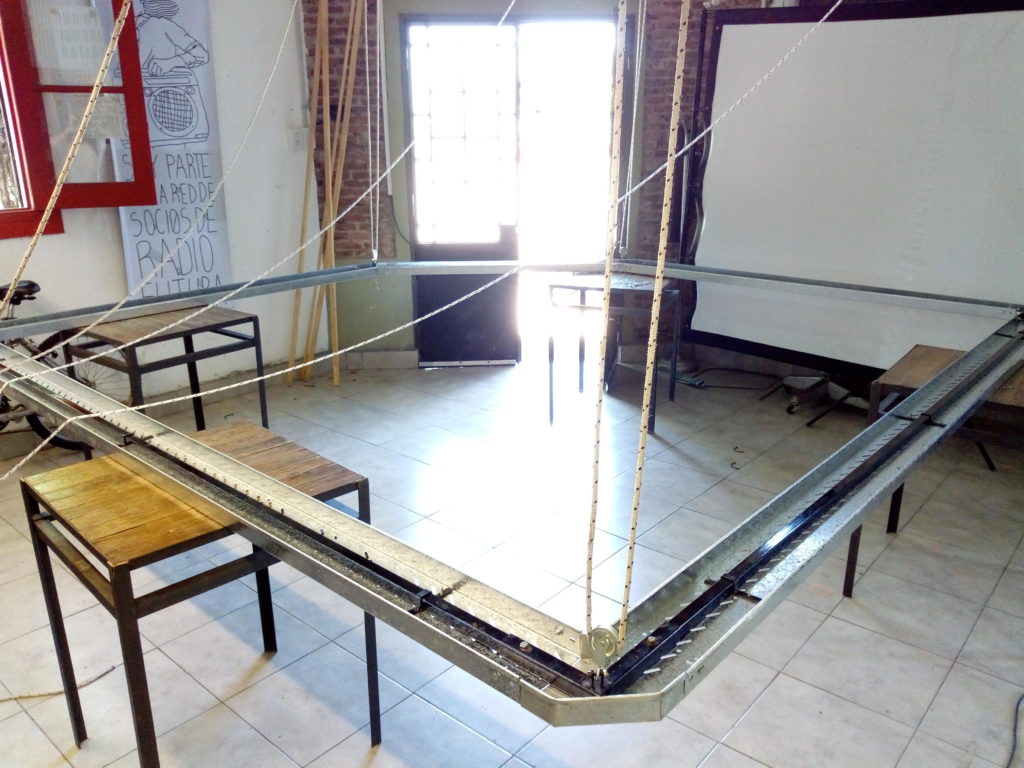
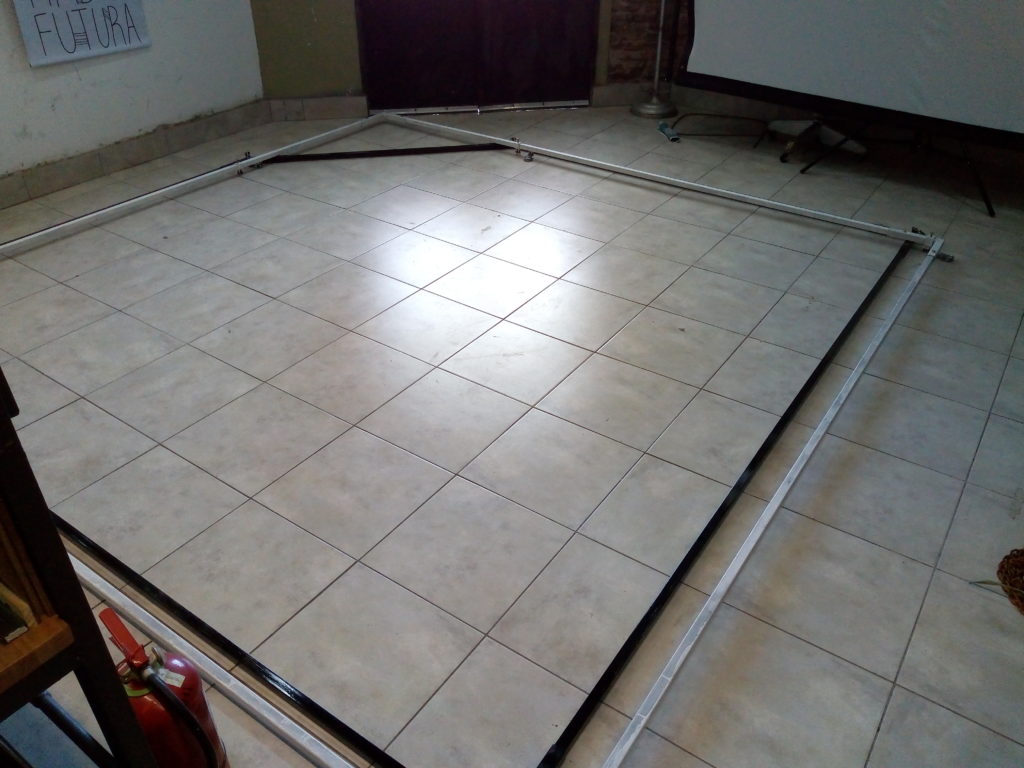
Today I hanged the lower frame and then attached the cable trays with a set of bespoke clamps and self tapping screws.
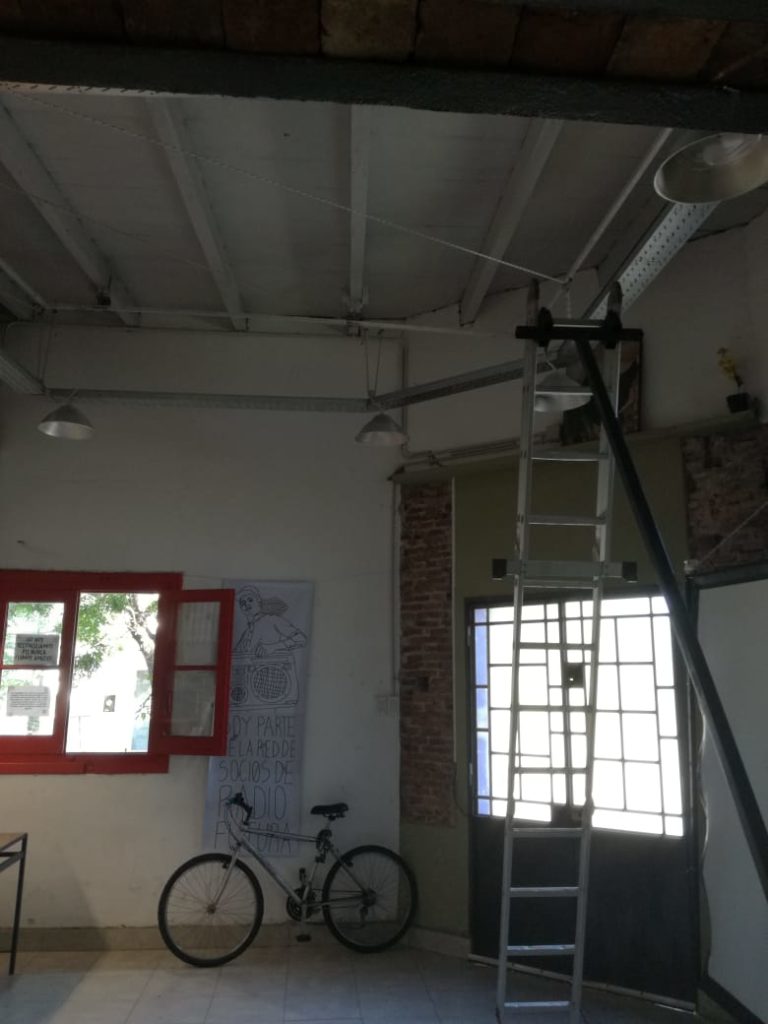

Today I started to replace that old wooden fixture with another one made of steel.
Our original plan was to install some cable trays to have a more industrial look.
Yesterday I assembled the frames on the floor:
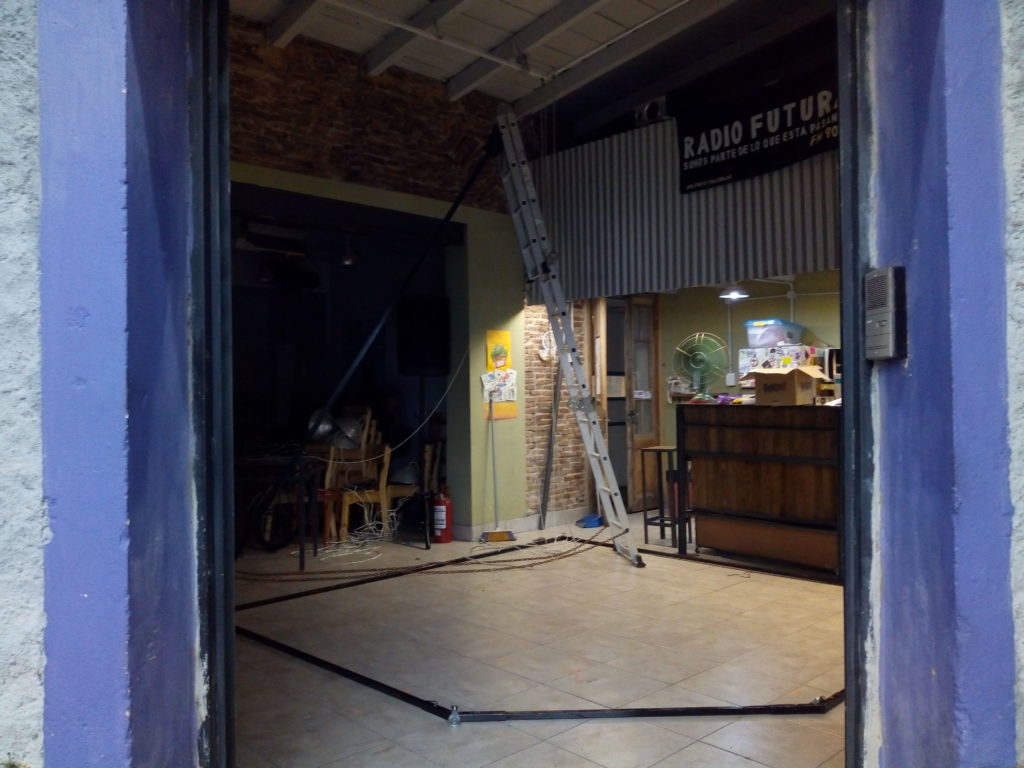
Today I spent most of the afternoon drilling the wood trusses on the roof and attaching the hooks. Then came the time to lower the old frame and hang the white on those hooks.
Letting it gently go down was easy:

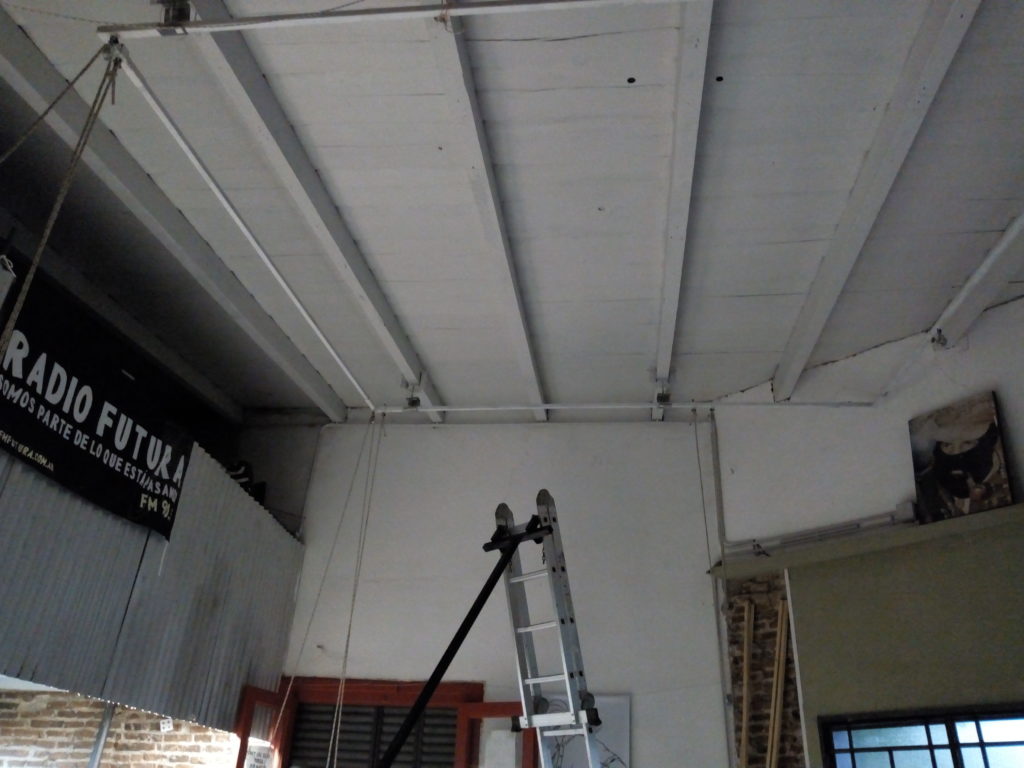
I used some wire to attach the new frame to the old pulleys and help me lifting it near the roof. That seemed a lot easier on the planning stage but I managed to pull it off in a couple of hours.
To end this day I wound the new rope on the pulleys. Tomorrow I’ll hang the other frame (the black) and screw the trays to it.
We have a discrete, and new, metal door but the inner handle is one that was in the house since the 1950’s.
On the outside there’s just a simple knob but it’s not linked to the lock. The handle works as intended but if we are not careful when pulling we end up with it on our hands.
I made a simple plate and kept the rod in place with an M4 screw threaded through it.
Looks like it came with the door:

Today I worked on the base mount for that bench. I chose a 20 degree slope (taken from that guide) as I found it comfortably and it’s a round number too.
I fumbled a bit with some pipes but the cuts and copes to build it properly are more demanding than the time I had, so I settled on some channel iron. The math is a lot easier, I just needed to offset one cut by (channel width) * tan(20°) or 2.6 cm.


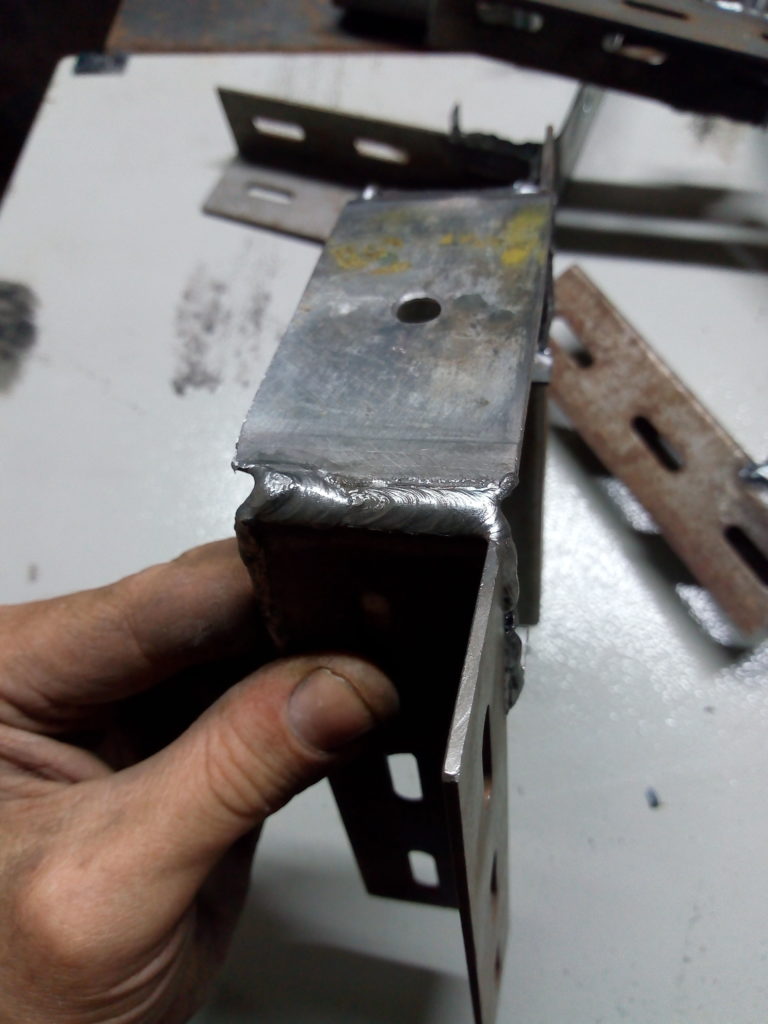
I’m very pleased with how I managed to make this weld around the corner in one pass:

Just a small Sunday project.
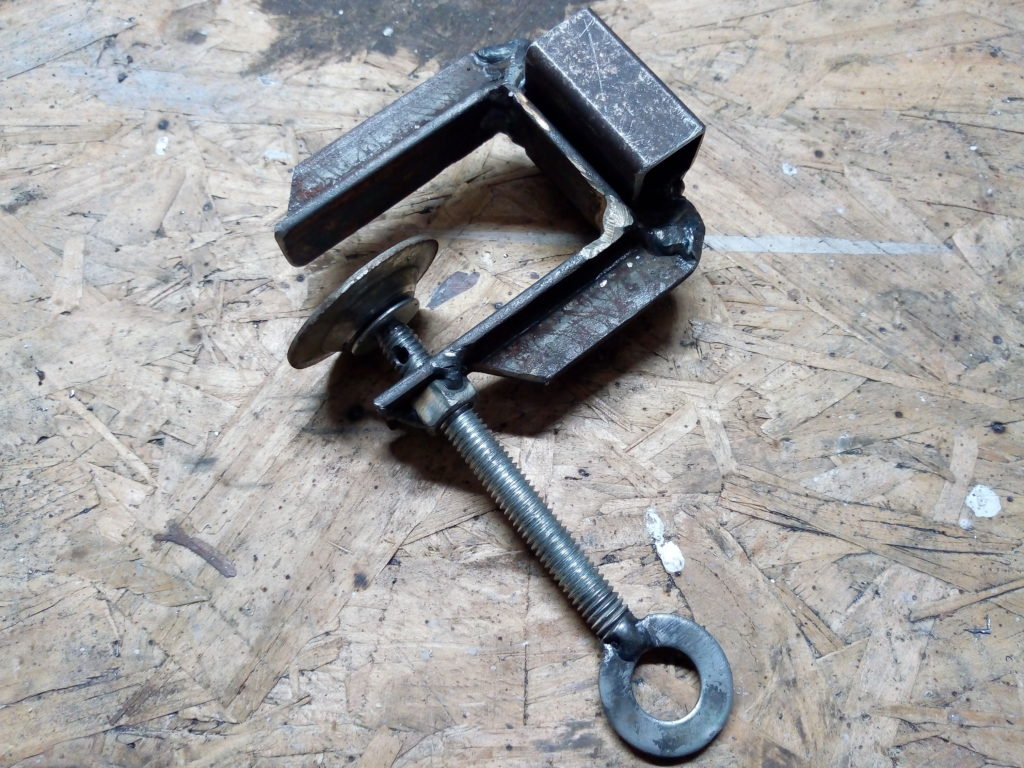
Here at the Uni lab we have a nice articulated lamp that lacks a base. It’s been sitting on a corner for ages so I set to make a new clamp for it.
The frame is just a bit of T beam with a nut and some square tubes welded.
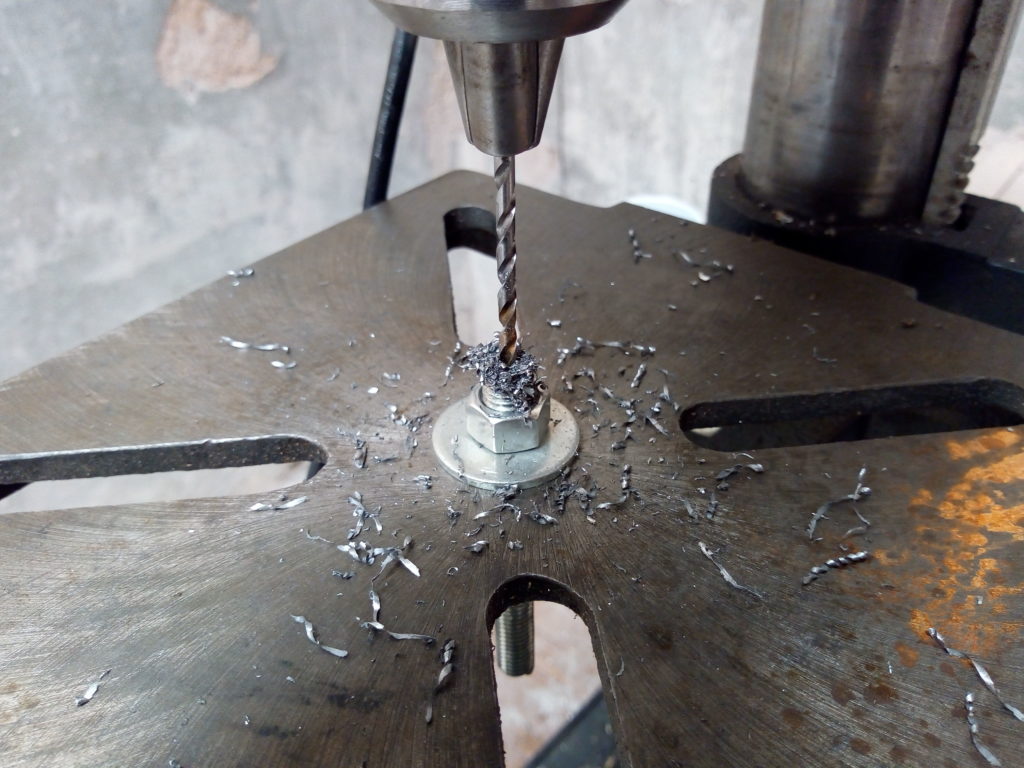
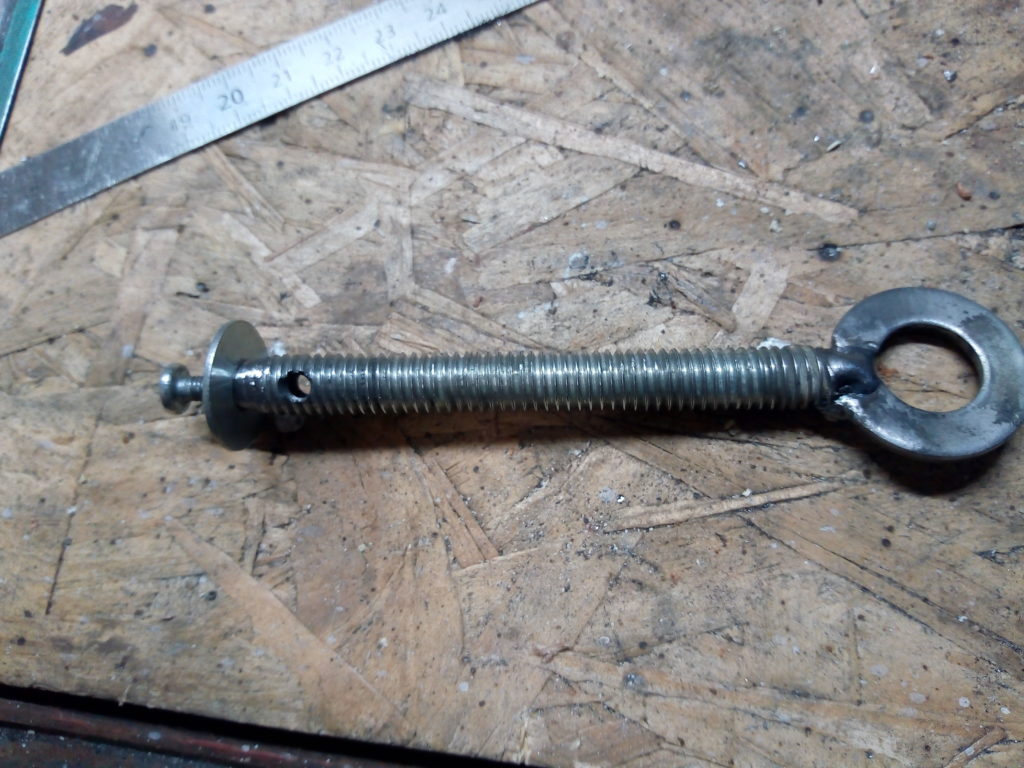
For the handle I used a bit of 3/8 threaded rod and a big washer I had lying around. In order to fix it I decided to make a hole along the axis and tap it to M3. After center punching the rod I screwed it to the drill press, using a center drill to align it. The plan was foiled when I tried to drill, as I left the base loose and it moved. But it’s good enough.

My initial idea was to use another nut and a locking pin behind the front washer but that used up a loot of the available space inside the clamp. After a bit of head scratching I ground a small taper and added a small washer to push the bigger one instead of a nut. I’m quite proud of how it turned out.
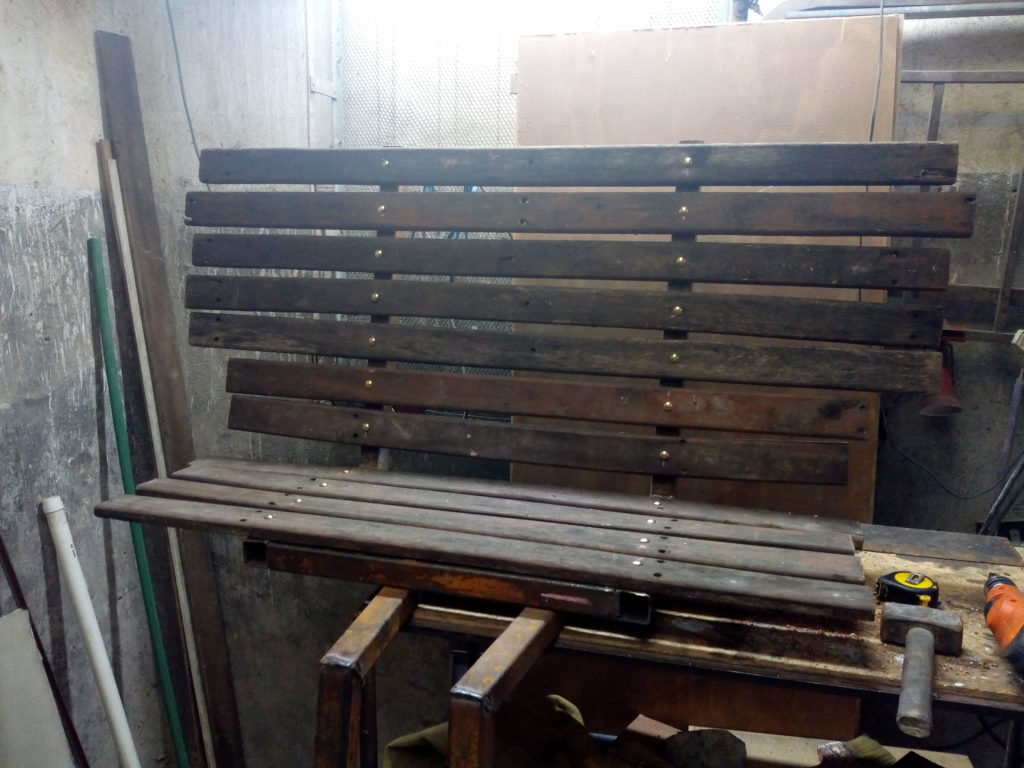
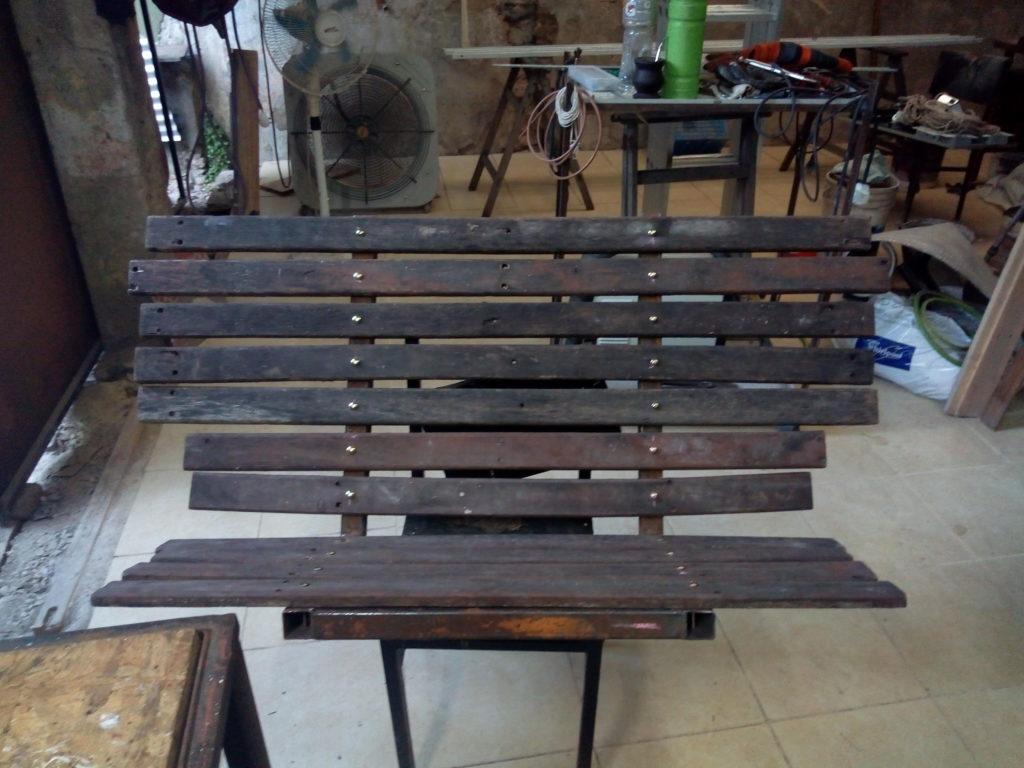
A while ago we were given a bunch of weathered wood from a deck. Some of us have been thinking of installing seats on the sidewalk and this looked like a good opportunity.
I looked around Core77 and there’s an entry just about seating that produced this helpful guide:

I built a simple frame with square tubing and used one of the wood packs to try it out. I need to select the best planks but it’s comfy and with a bit of paint will look good.
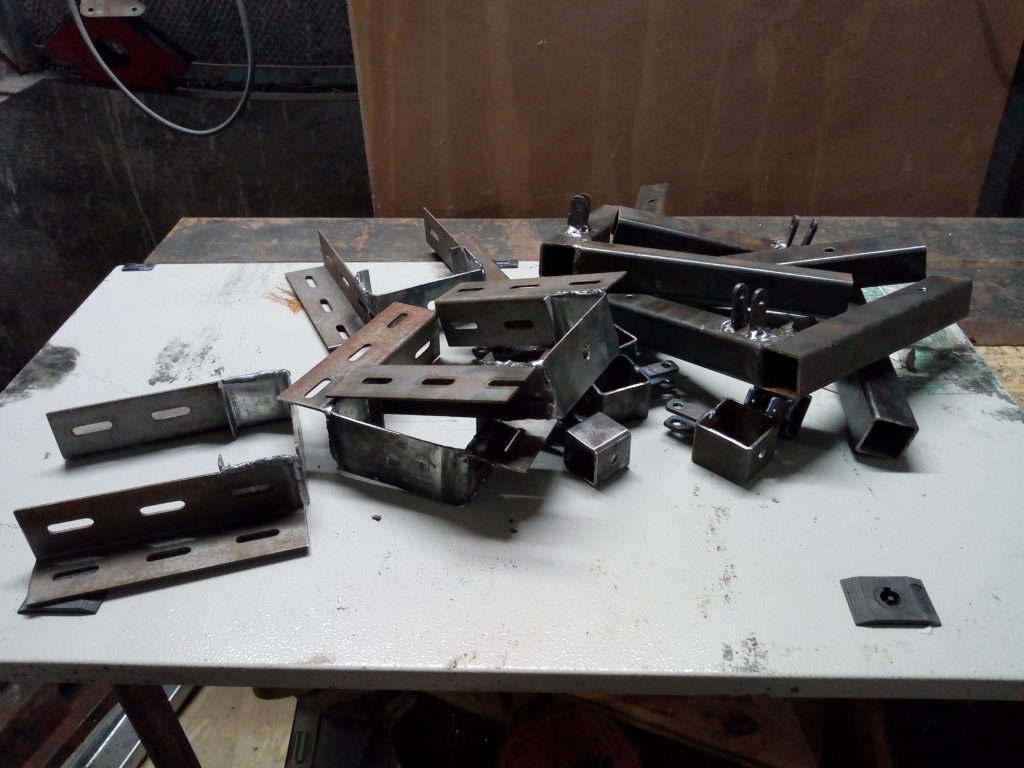
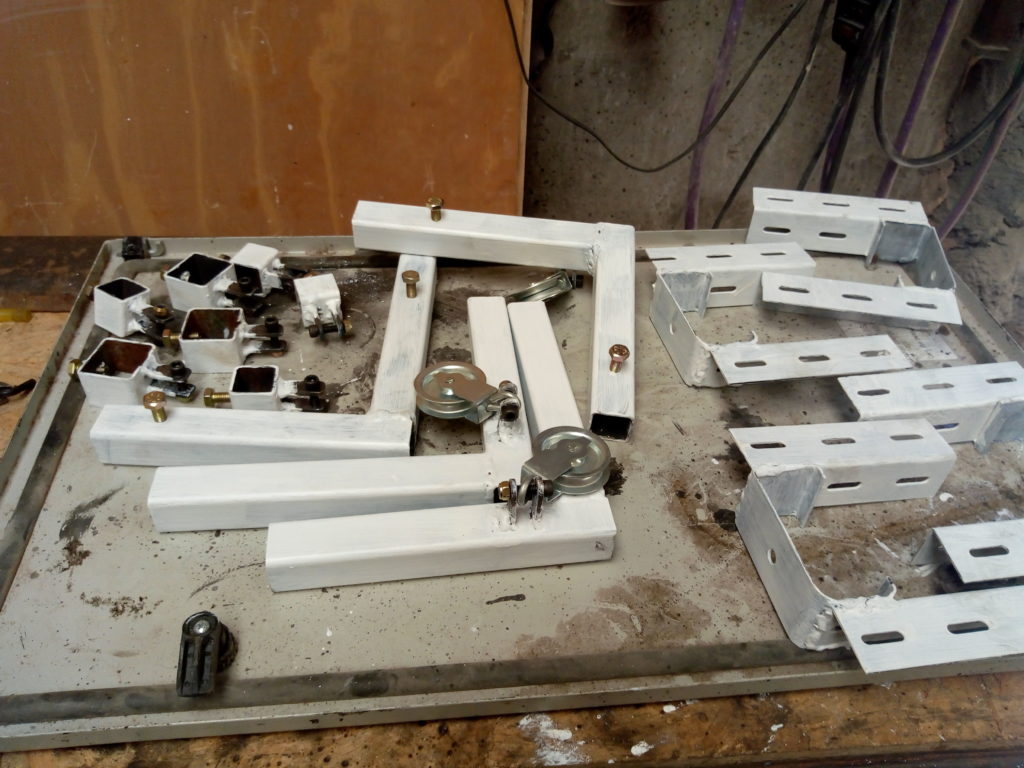
The last two days I finished the welds on those clamps, built some to hold the other end of the ropes and four sturdier to screw to the roof trusses. All the screws are paired with either a nylock or two nuts locked to each other.
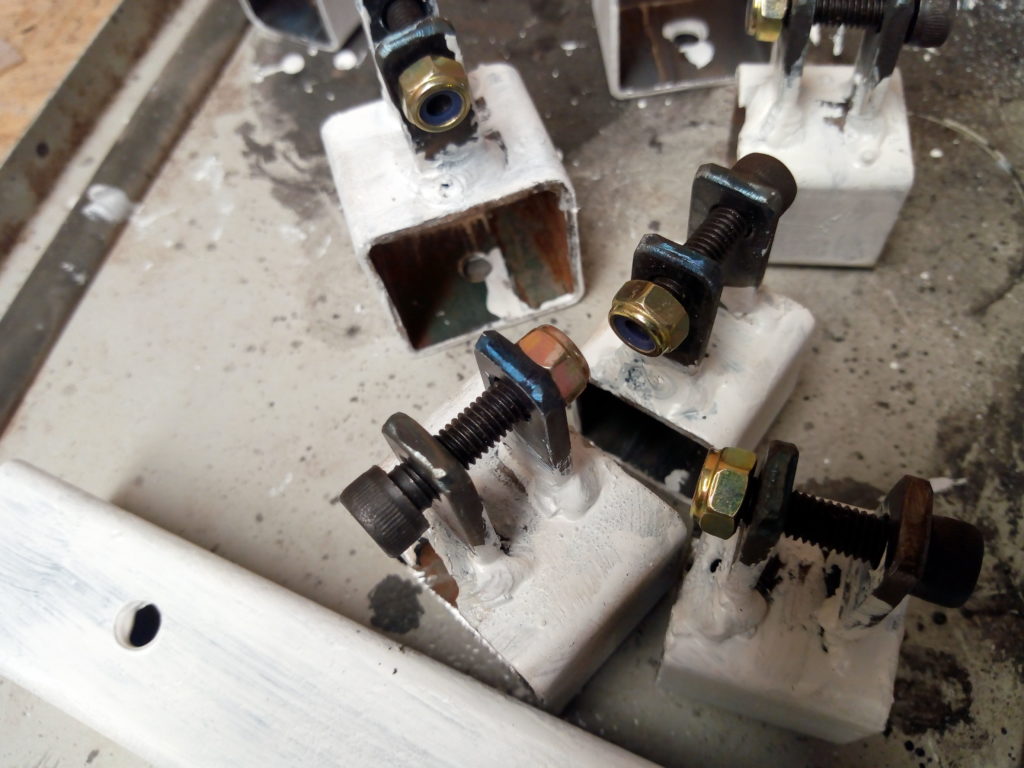
I painted the pieces for the bottom frame with black enamel and the ones for the roof with white to match the rest of the room. I know they’ll rust in some weeks but I left the blued surface exposed. I never tire of looking at them.
We had a nice wood slab from the kitchen remodelation and wanted to make a small table with it.
I did a quick sketch and started to build the base. I goofed a bit when cutting the intersections but it ended up fine and level on the first time anyways.


Sometimes I flunk on the easiest of the welds and others, I make a perfect one in a very hard spot. I did this one on a single pass with a bent rod and even had slag peel:

